
Enhancing Your Code with Microsoft Copilot on a Mac
Enhancing Your Code with Microsoft Copilot on a Mac
Quick Links
- Install Microsoft Copilot From the Mac App Store
- Install Microsoft Copilot as a Web App on Your Mac
- Getting Started With Microsoft Copilot on Your Mac
- The Benefits of Using Copilot Over ChatGPT
Key Takeaways
- Mac users can install Microsoft Copilot in two ways: through the App Store on Apple silicon Macs or as a web app on Intel Macs.
- You can set your Mac to launch Copilot at the press of a key with the built-in Shortcuts app.
- Unlike ChatGPT, Copilot lets you access GPT-4 for free.
MUO VIDEO OF THE DAY
SCROLL TO CONTINUE WITH CONTENT
Microsoft doesn’t offer a native Mac app for Copilot, but Mac users can still install the popular chatbot on their computers. There are two ways to get Copilot on a Mac, and you can even launch it at the press of a button.
Install Microsoft Copilot From the Mac App Store
If you have an Apple silicon Mac, you’re in luck because you can install and run the iPad version of Microsoft Copilot on your computer. Here’s how:
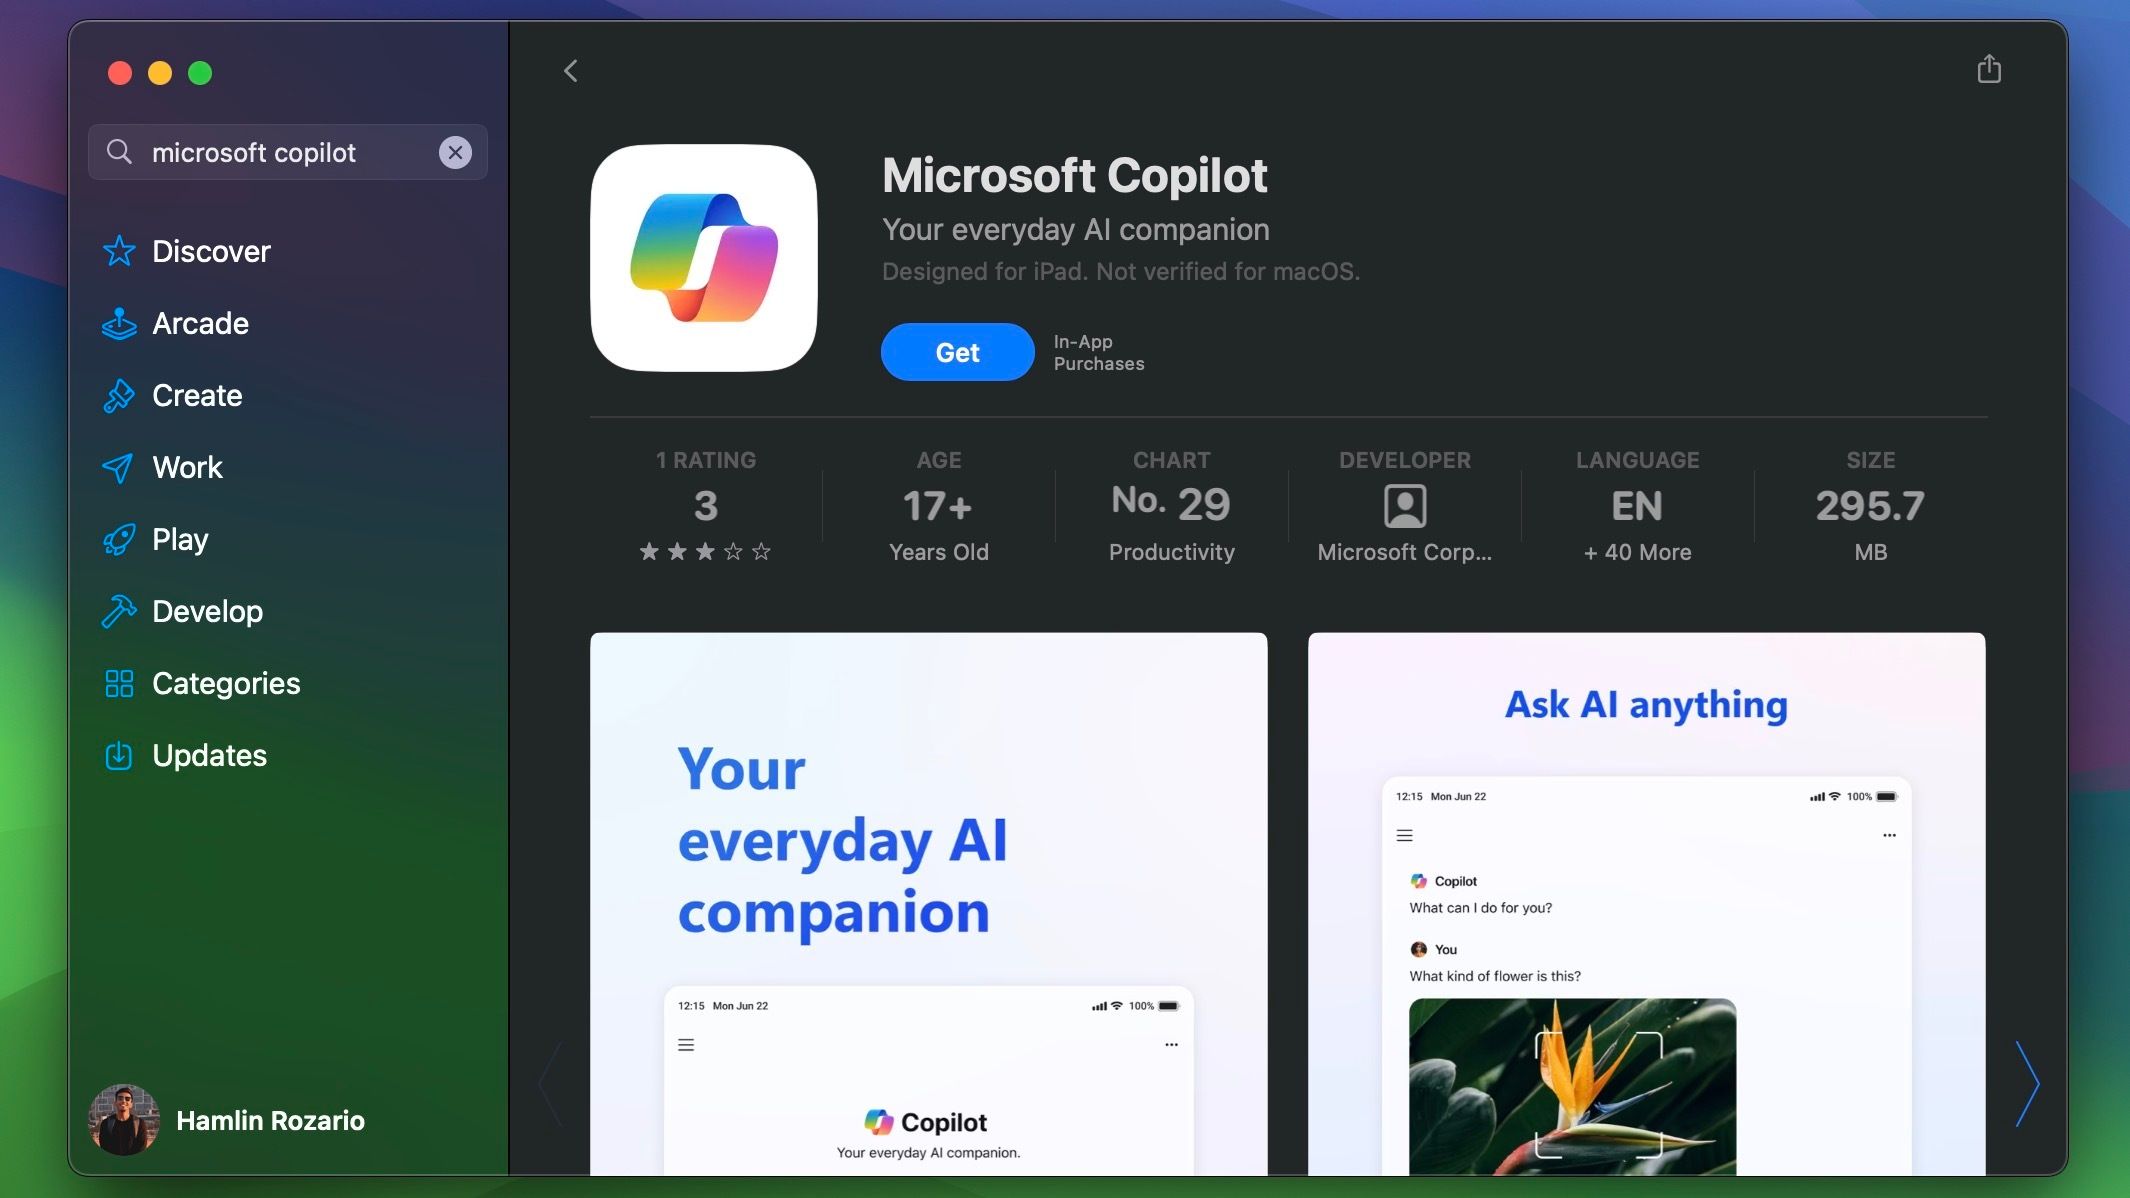
- Launch the App Store app on your Mac from the Dock, Launchpad, or the Applications folder in Finder .
- Search for “Copilot” to find the app listed under the iPhone & iPad Apps section.
- Click Get next to the app’s name to install it.
- You’ll find the app in your Launchpad. You can drag it to the Dock to access it quickly.
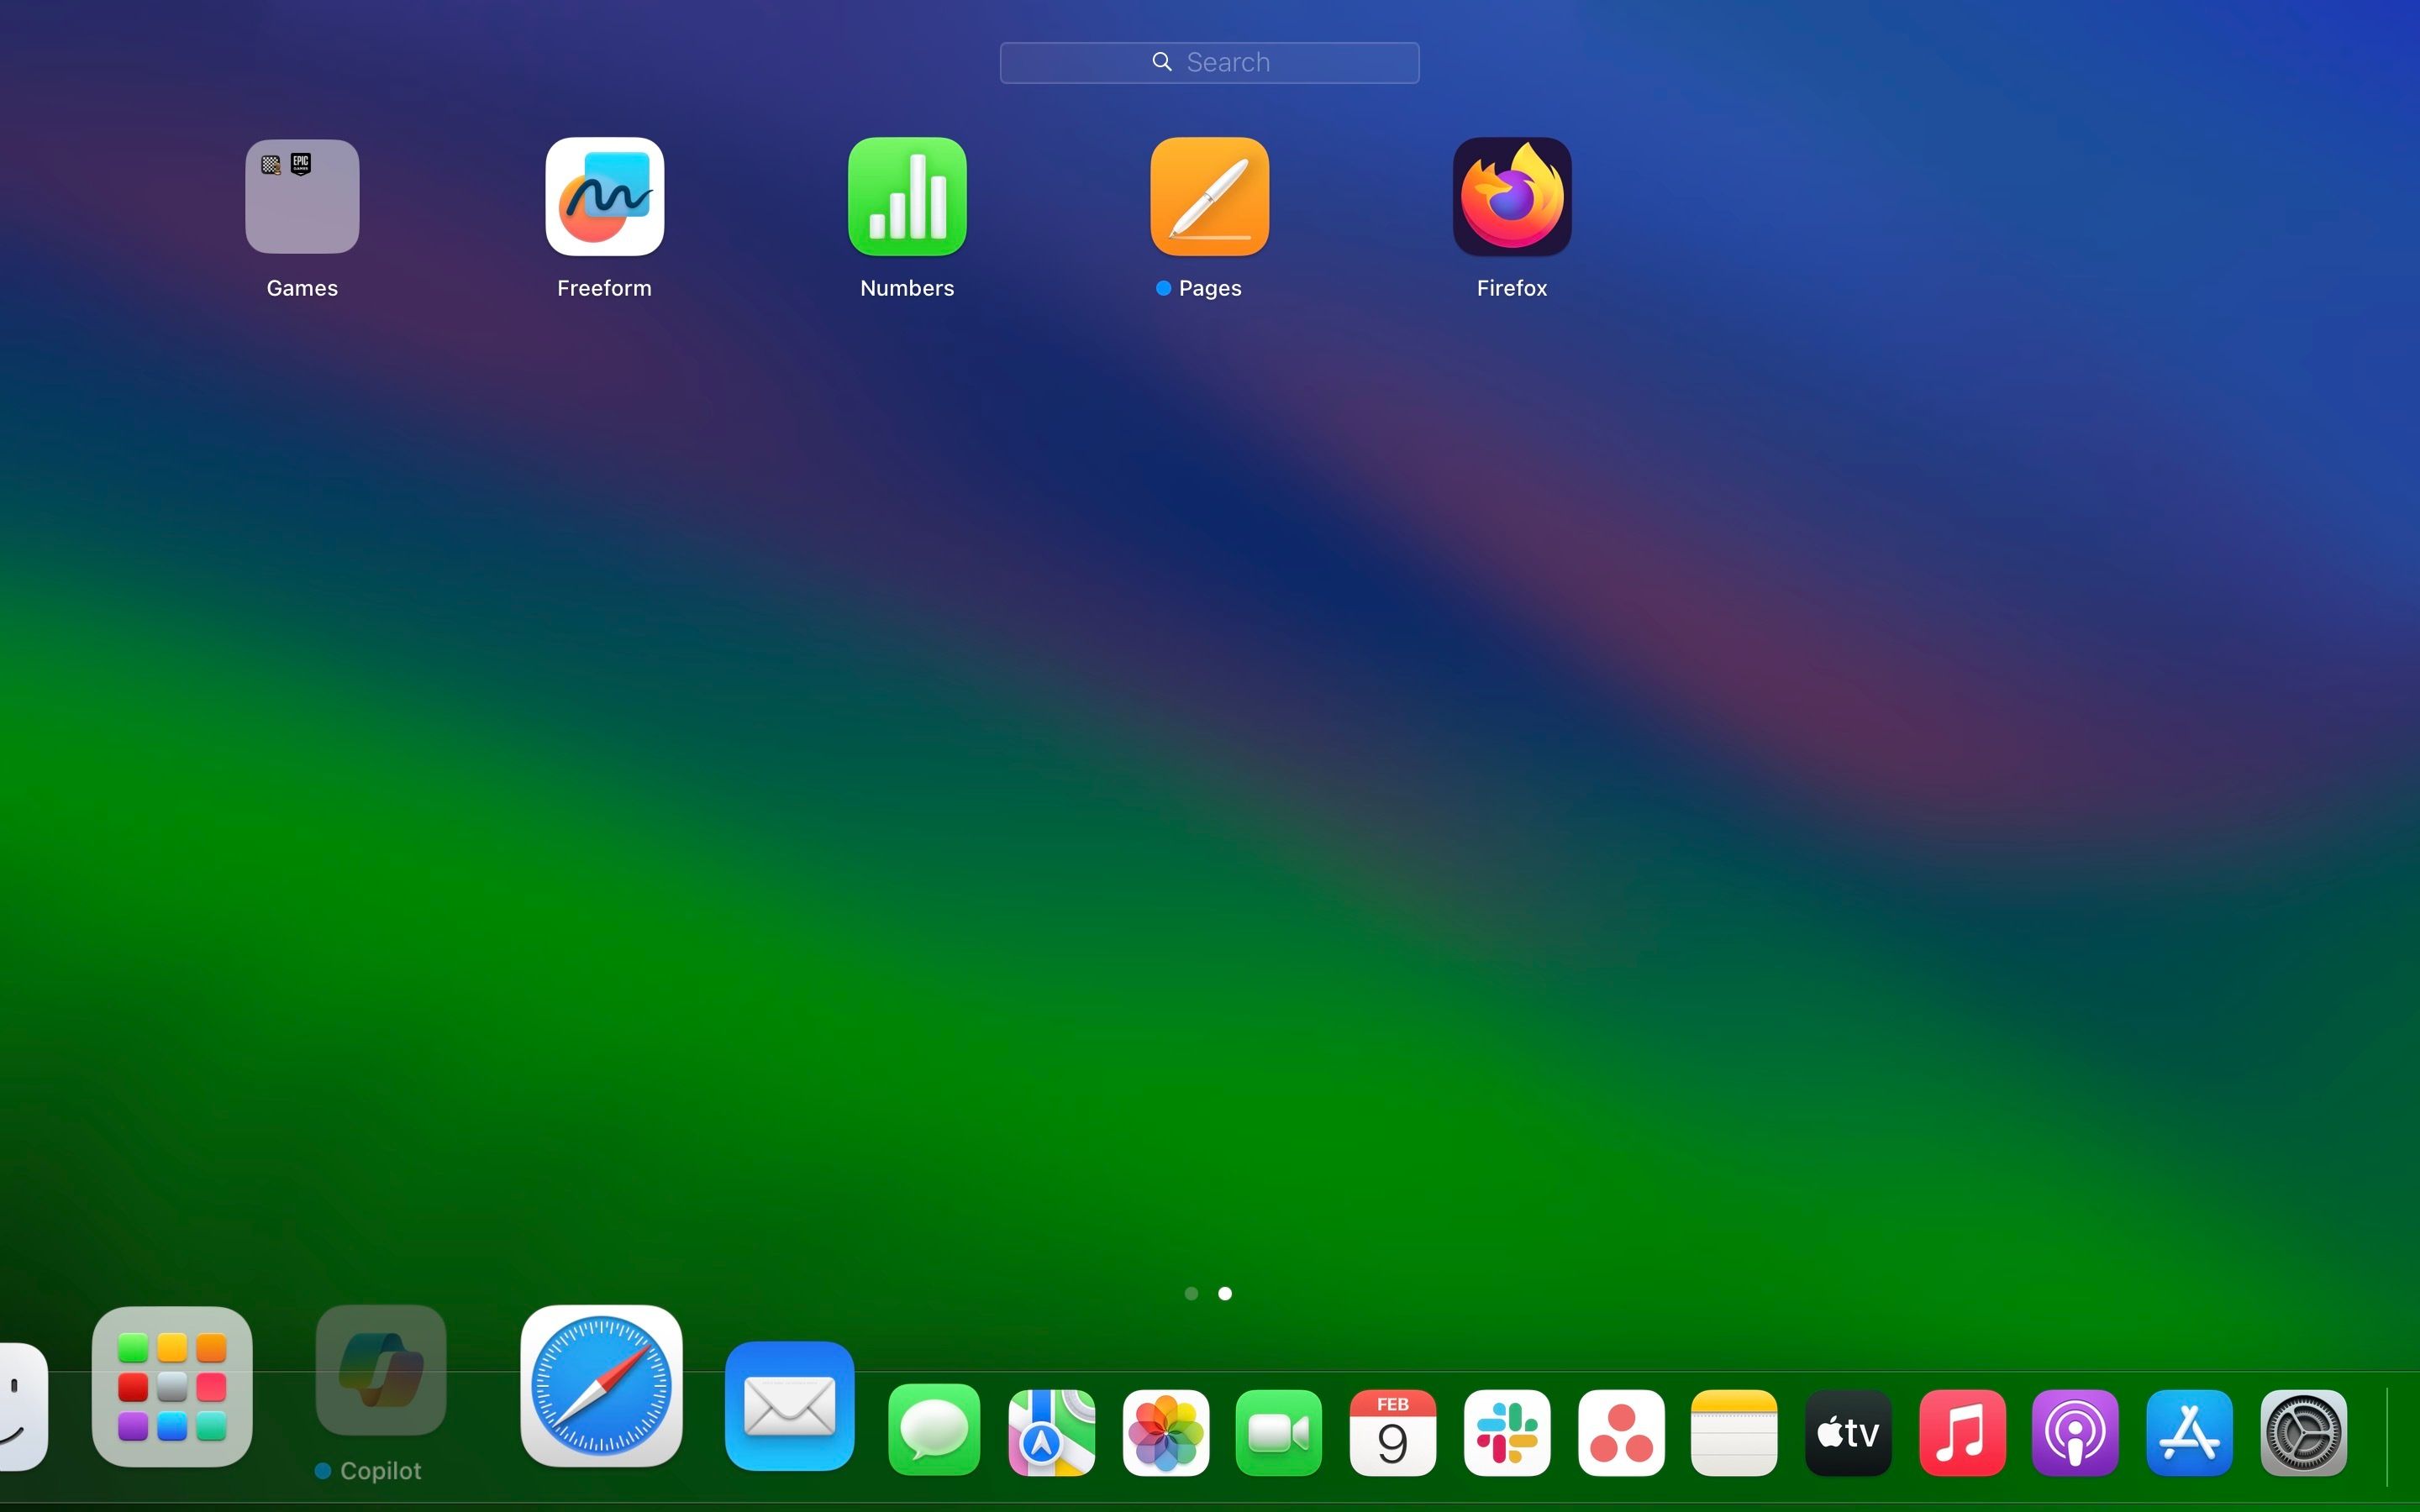
Double-click its icon to start using Copilot right away. Jump to the Getting Started section below to get acquainted with the app.
How to Launch Copilot on Mac With a Keyboard Shortcut
If adding Copilot to the Dock isn’t convenient enough, and you’d like to launch Microsoft’s AI chatbot at the press of a button, you can create a custom shortcut using the Shortcuts app in macOS:
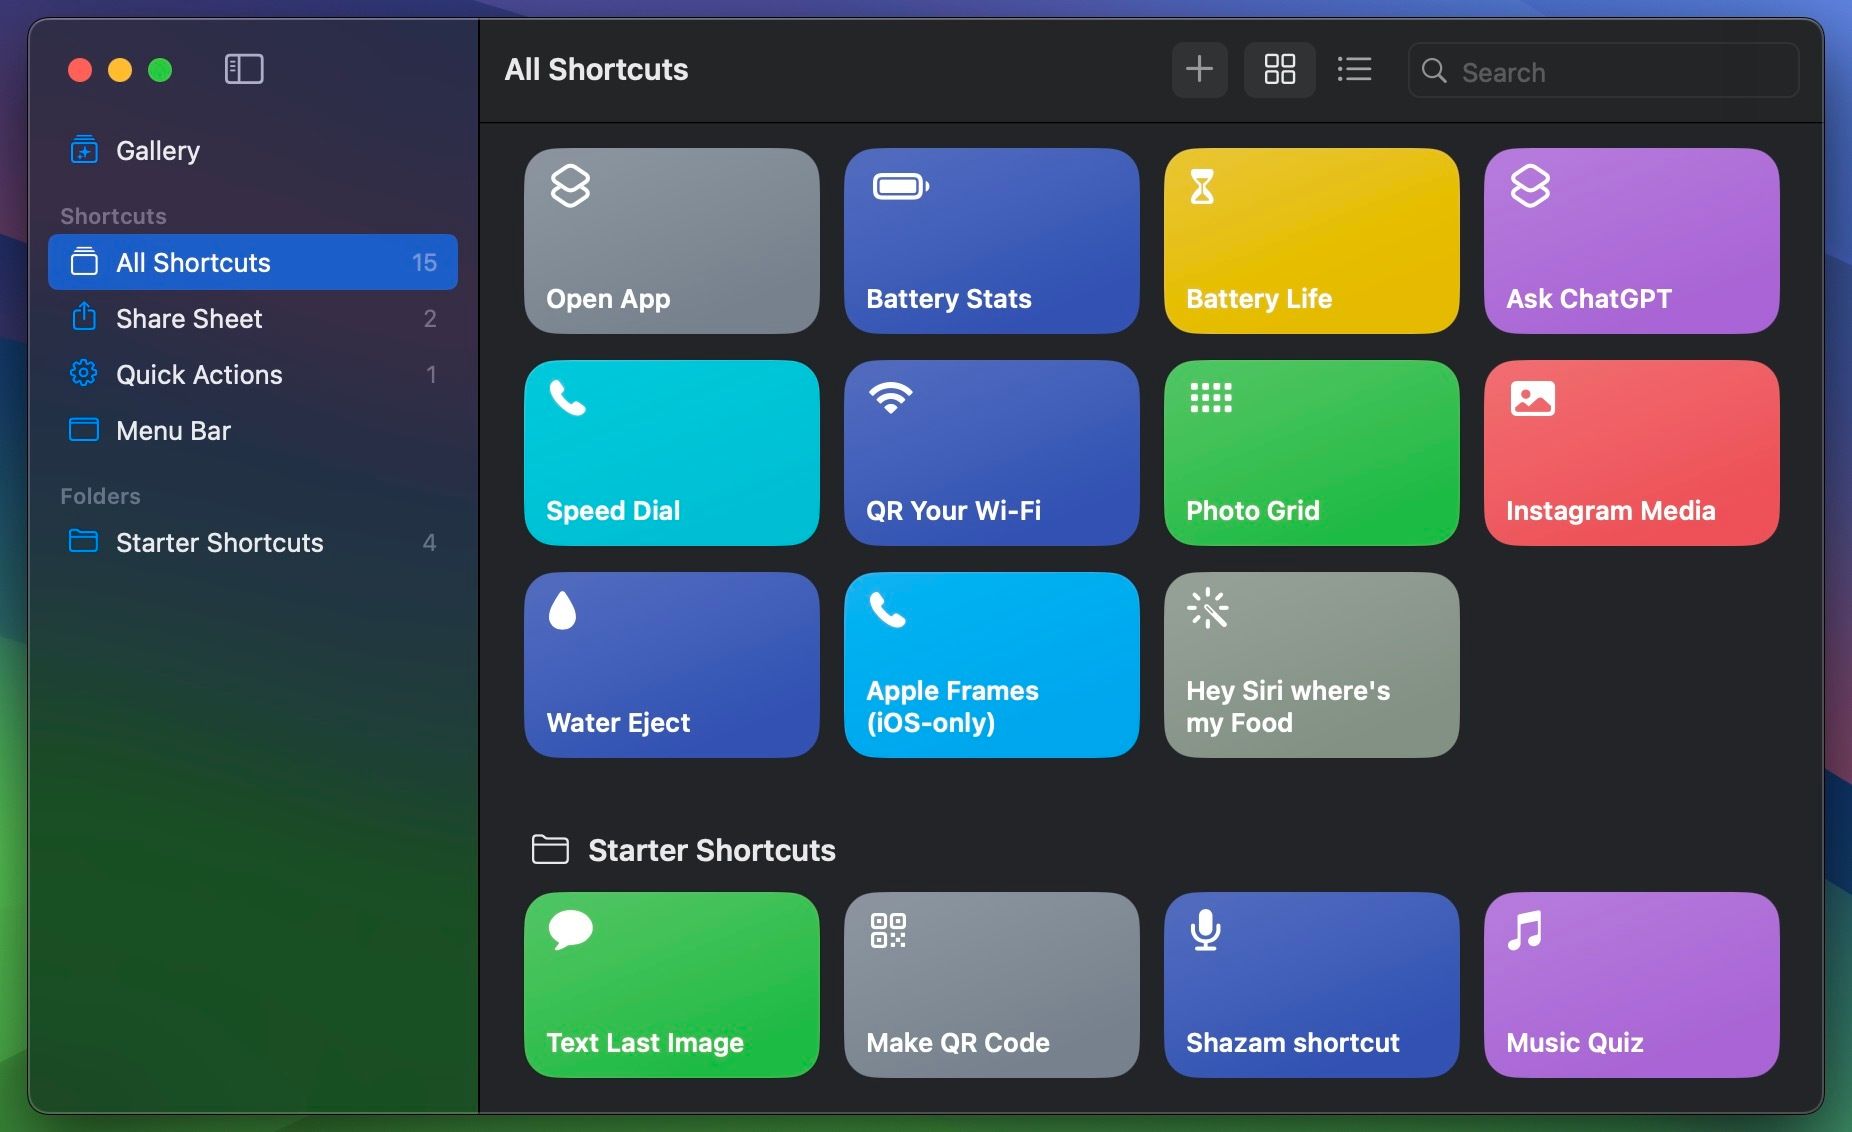
- Launch the built-in Shortcuts app on your Mac. You’ll see it in the Launchpad inside the Other folder. Alternatively, use Spotlight search on your Mac (Command + Space) to find it.
- Select All Shortcuts from the left sidebar and click the plus (+) button in the toolbar at the top of the window to create a new shortcut.

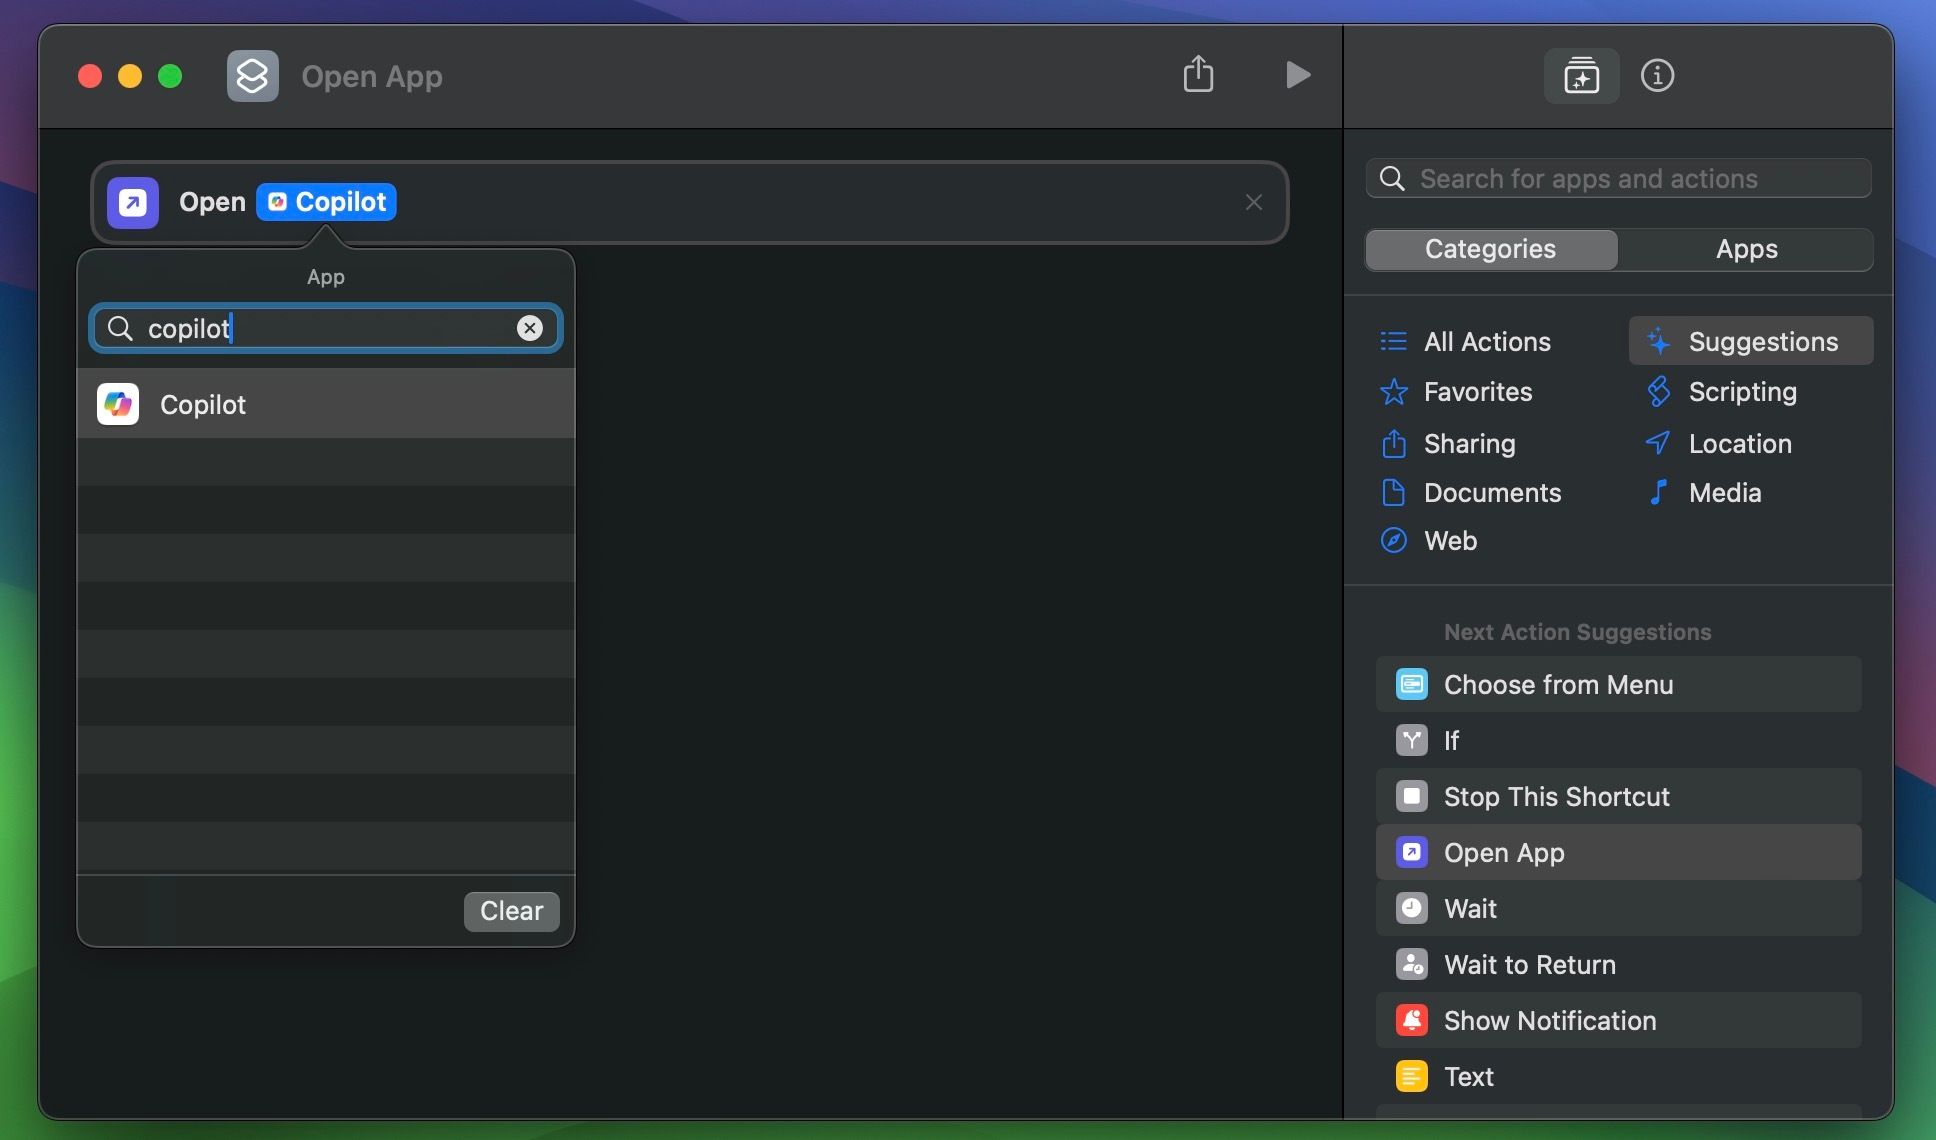
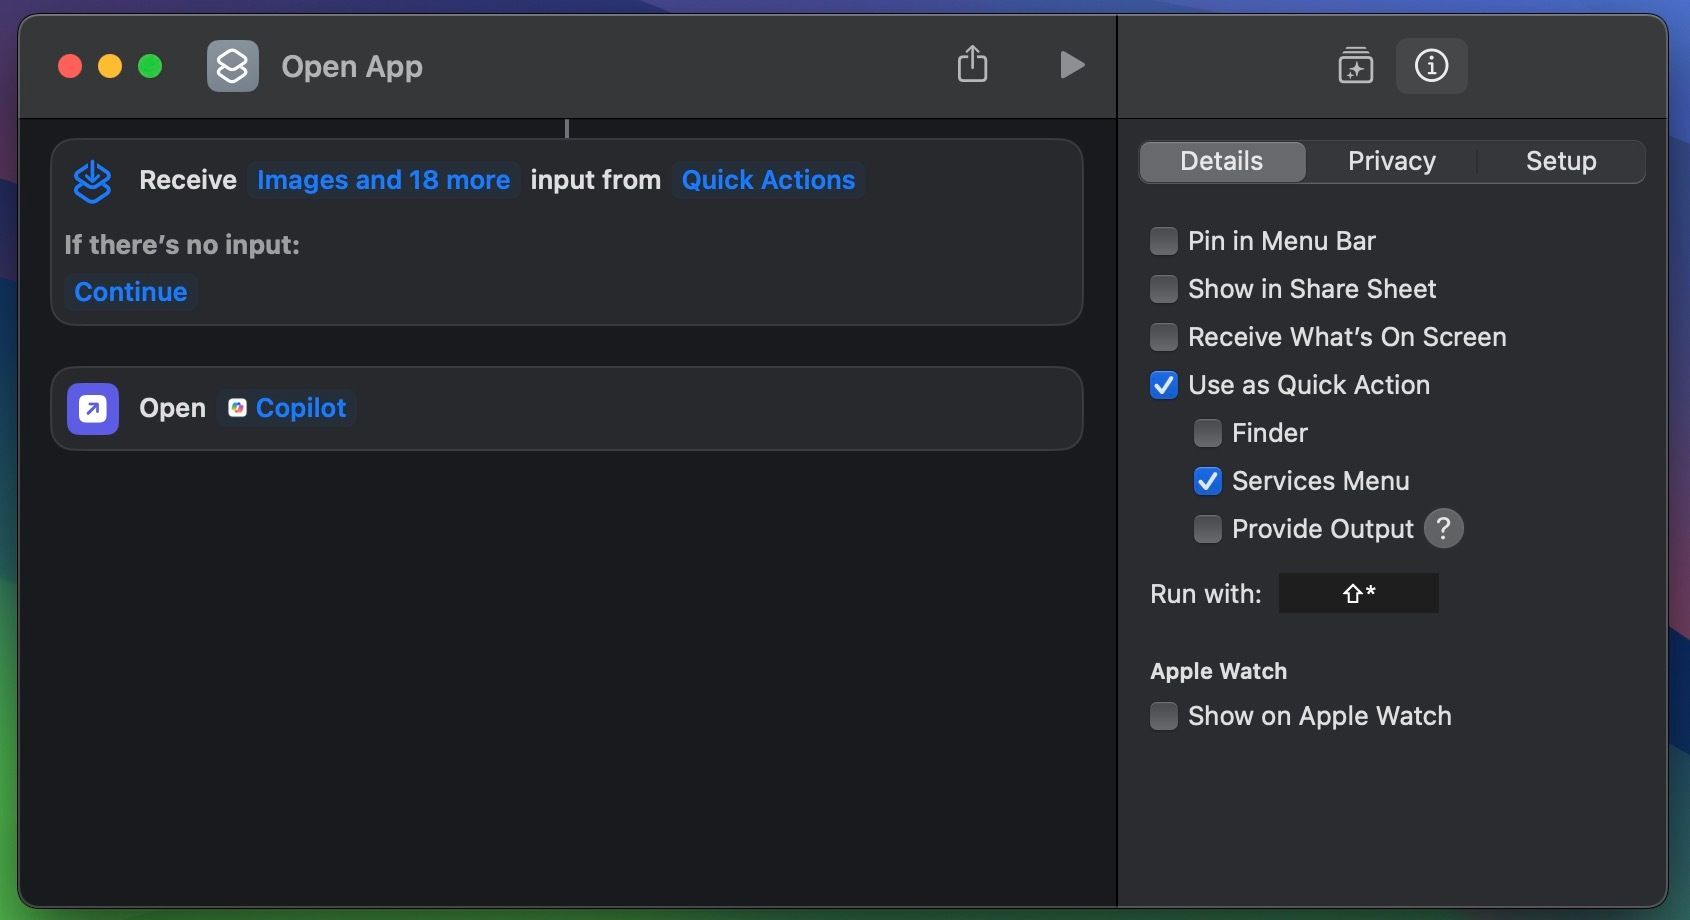
- Drag the Open App action from the right sidebar to the empty space on the left.
- Click the blue App field and use the search bar to find and select Copilot.
- Next, switch to the Info (i) tab of the sidebar and click Add Keyboard Shortcut.
- Now, enter a key combination you like, but make sure it doesn’t overlap with any other useful Mac keyboard shortcuts . Then, hit the Return key.

You can now exit the Shortcuts app and enter the keyboard shortcut you added to quickly launch Microsoft Copilot on your Mac, no matter what you’re doing.
Install Microsoft Copilot as a Web App on Your Mac
If you have an Intel Mac, you won’t be able to install Copilot’s iPad app from the Mac App Store. Instead, you’ll need to install Microsoft Copilot as a web app on macOS Sonoma or later:
- First, update your Mac if it’s not already running at least macOS Sonoma.
- Open Safari and head to Microsoft Copilot’s webpage .
- Now, click File > Add to Dock from the menu bar.
- When you get a confirmation pop-up, click Add.
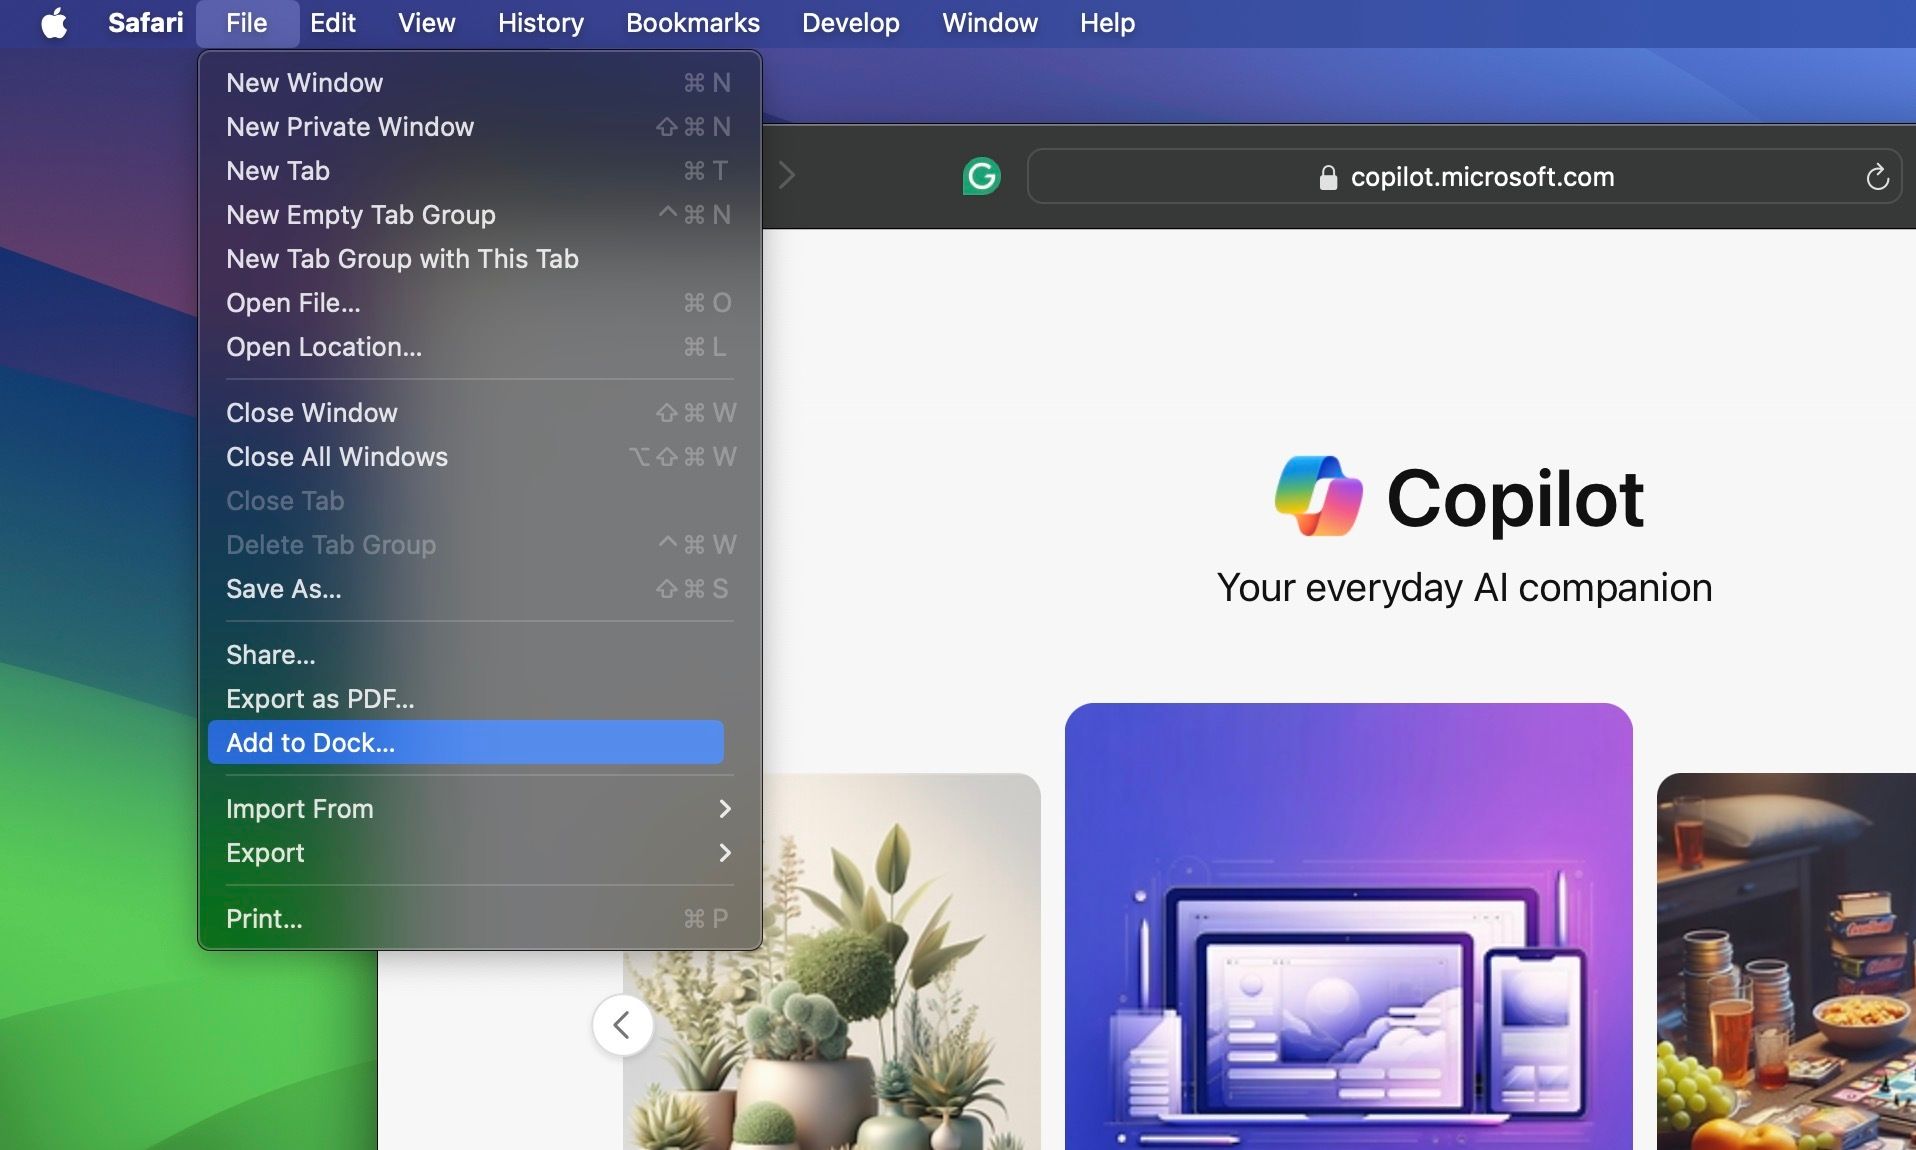
You’ll find the Copilot web app on your Dock immediately. Launch it to begin.
Getting Started With Microsoft Copilot on Your Mac
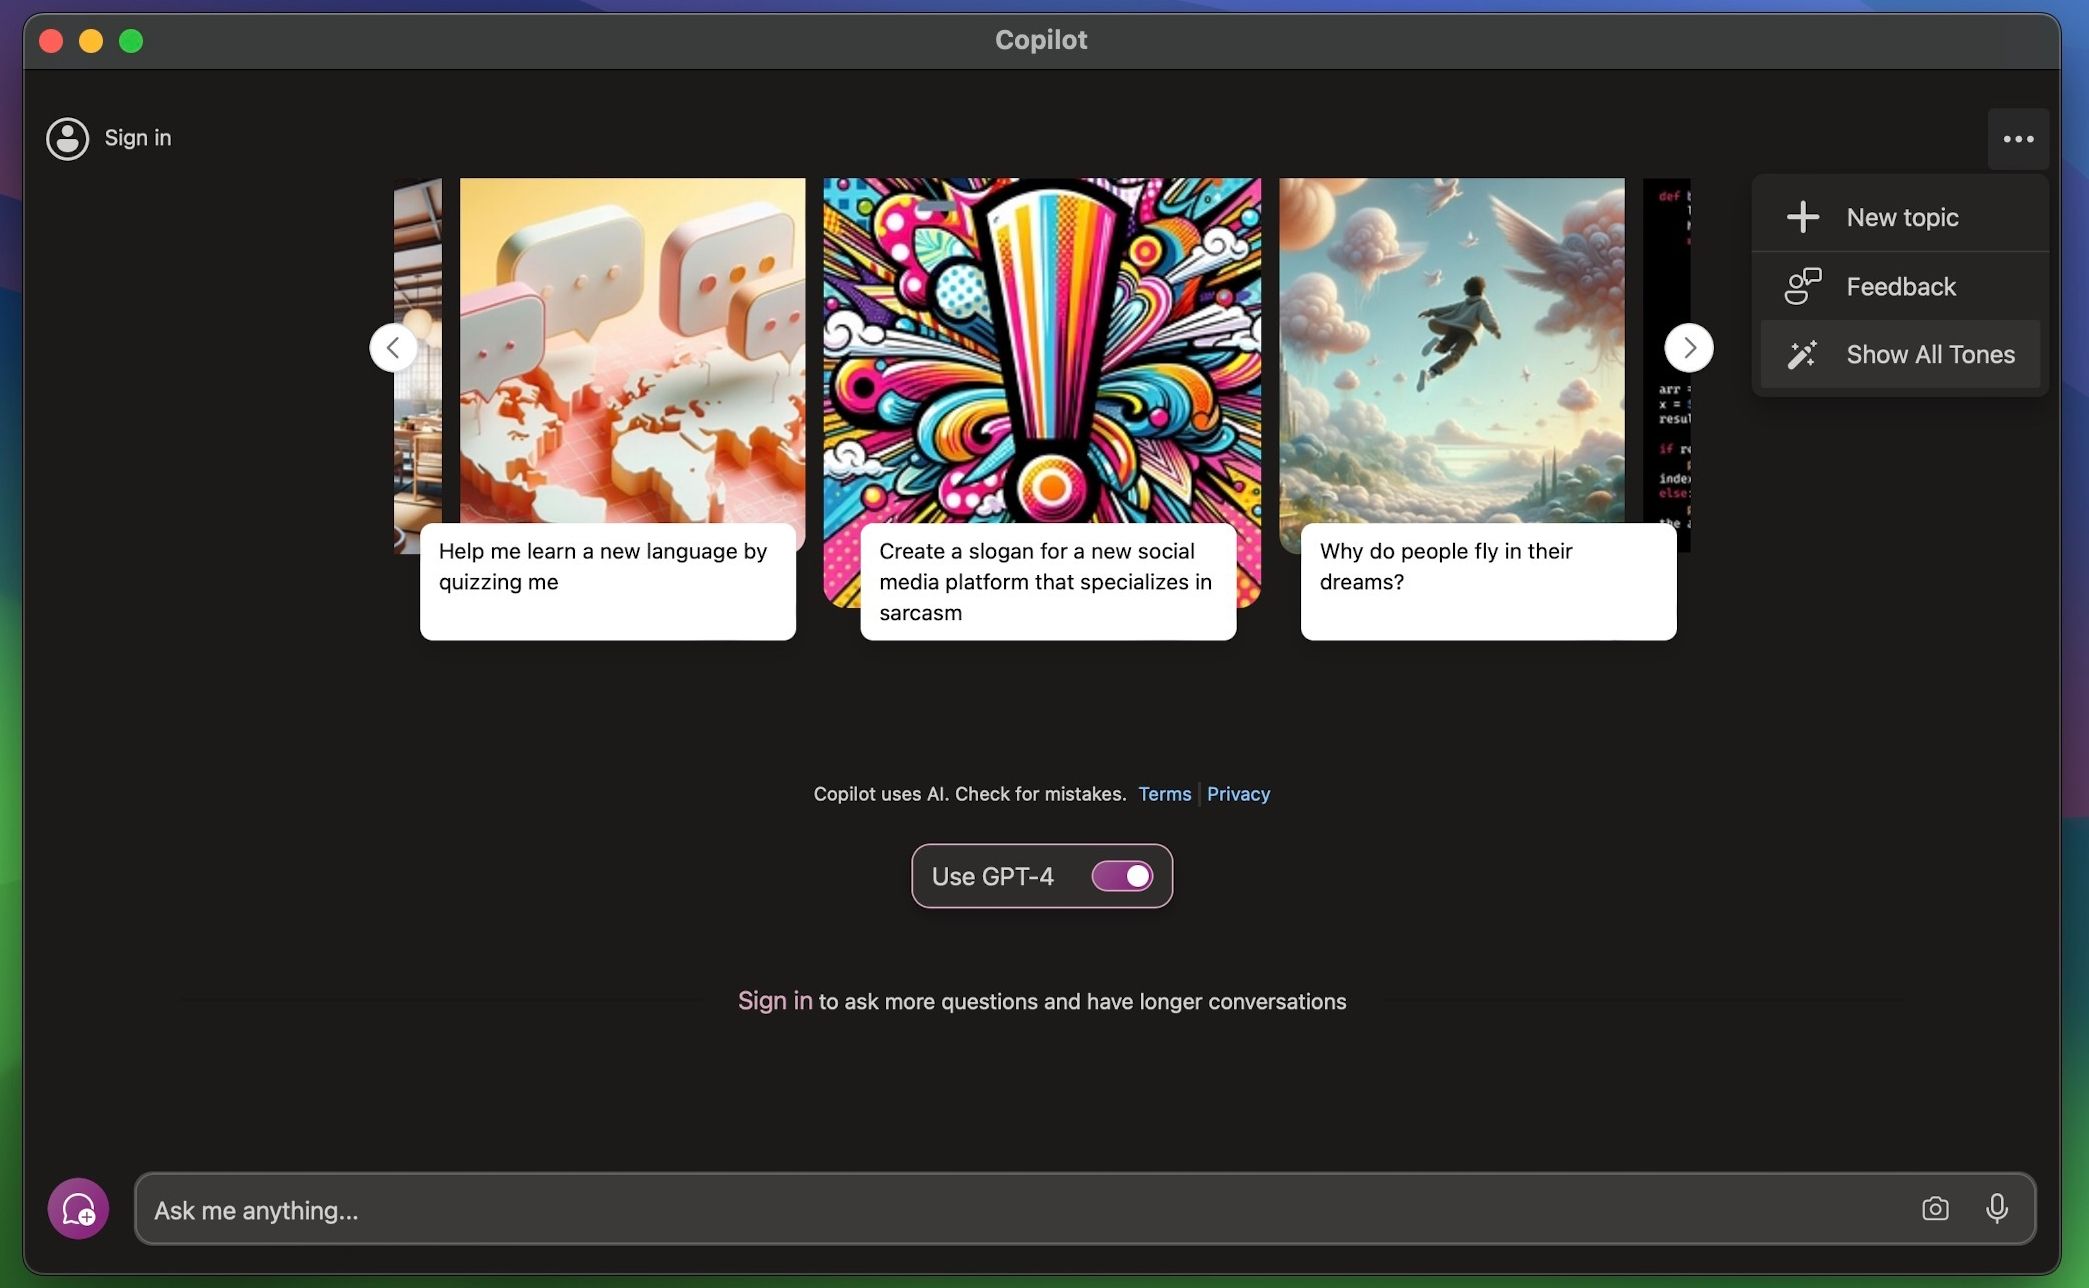
When you launch Copilot for the first time, you’ll see its welcome screen prompting you to agree to Microsoft’s Terms of Service. Click Continue and follow these steps to configure Copilot on your Mac properly:
- The first thing you should do is enable GPT-4, as that’s one of the biggest advantages of using Copilot over ChatGPT. Scroll down on the main screen and toggle on Use GPT-4.
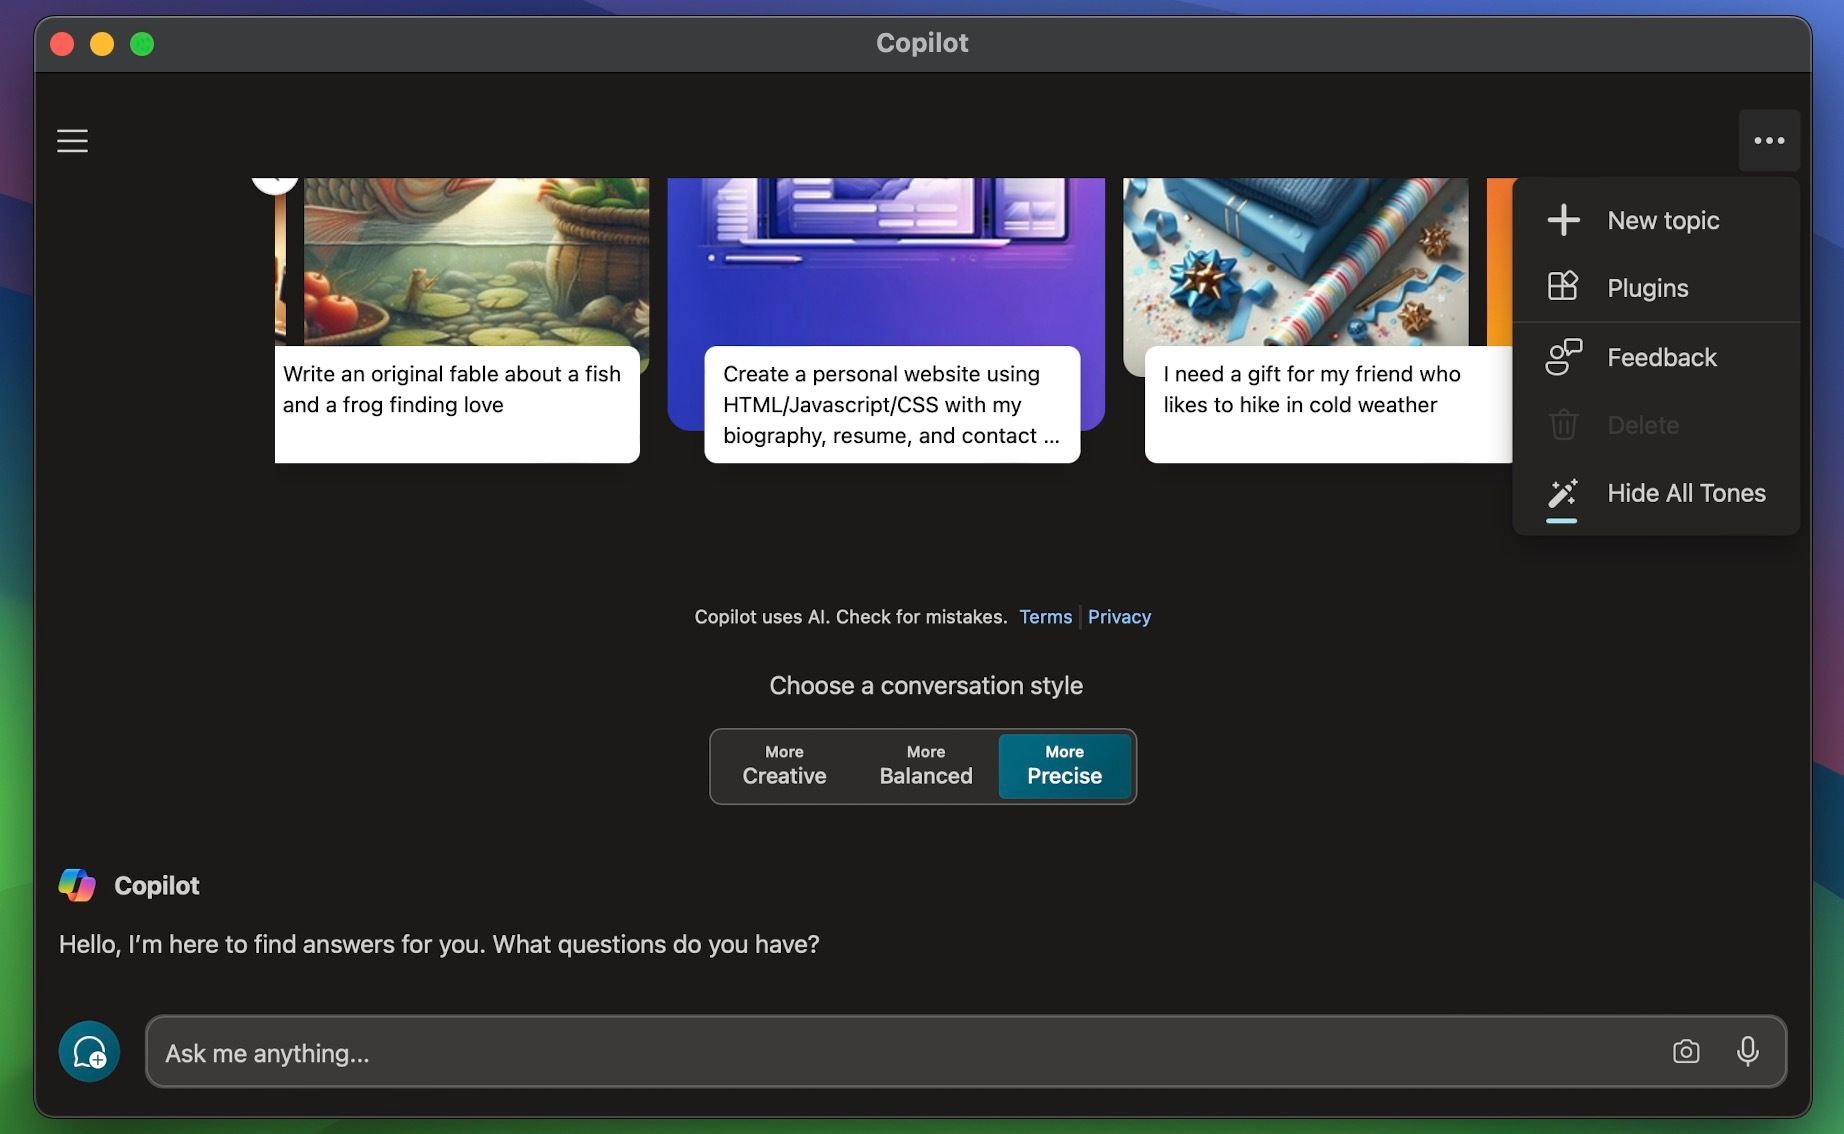
- Next, click the ellipsis (…) icon in the top-right corner of the window and choose Show All Tones to customize Copilot’s responses.
- You can choose from Creative, Balanced, and Precise. By default, it’s set to Creative, which gets you descriptive responses. I use the Precise setting as I prefer concise responses with only the facts that I need.
- Additionally, you can click Sign in in the top-left corner of the window and log in with your Microsoft account. This allows you to ask more questions and have longer conversations with the AI chatbot.
At this point, you’re all set to use Copilot on your Mac at its full potential. If you want to make further tweaks, click the three-line icon in the top-left corner to access the app’s settings menu. Here, you can change the theme, region and language, permissions, and privacy settings for Copilot.
You can clear your Copilot search history by heading to the app’s privacy settings menu.
The Benefits of Using Copilot Over ChatGPT
The biggest advantage of using Microsoft’s AI chatbot over OpenAI’s ChatGPT offering is that you can access GPT-4 for free . This means you can include images in your queries, take advantage of DALL·E 3 art generation, install third-party plugins to expand Copilot’s feature set, and more.
ChatGPT users, on the other hand, have to pay a monthly fee for a ChatGPT Plus subscription to access these features. Even though it’s possible to use ChatGPT on a Mac , you won’t find the iPhone or iPad version of ChatGPT on the Mac App Store.
It’s also worth noting that ChatGPT doesn’t let you change the tone of its responses like Copilot. All in all, if you want the best AI chatbot experience on your Mac without having to spend a penny, Microsoft Copilot is your best bet—at least for now.
Also read:
- [New] 2024 Approved Extended Scrutiny GoPro SLR4 Black Edition Model
- 9 Best Free Android Monitoring Apps to Monitor Phone Remotely For your Xiaomi Redmi Note 12 5G | Dr.fone
- ChatGPT: Max Char Count & Workarounds?
- Come Passa Da AOMEI Backupper Standard Al Pacchetto Avant-Garde Con L'ultima Edizione Gratuita?
- In 2024, Bypass iCloud Activation Lock with IMEI Code On your iPhone 15 Pro Max
- In 2024, Unlock Your Video's Potential with YouTube Link Building Techniques
- New Milestone Achieved: ChatGPT’s Significant Updates Explored!
- Step Into the Future: Customized GPT Solutions by OpenAI
- Strategic Advantages of Enterprise-Ready GPT Systems
- The Evolution of Electric Cars: An Engaging Overview
- The New Age Analyst: GPT-3's Impact on Data Management
- The Shift in Development Due to AI
- Vibrant Video Vibes Merging Melodies with Media for 2024
- Title: Enhancing Your Code with Microsoft Copilot on a Mac
- Author: Brian
- Created at : 2025-01-15 16:37:21
- Updated at : 2025-01-18 16:41:32
- Link: https://tech-savvy.techidaily.com/enhancing-your-code-with-microsoft-copilot-on-a-mac/
- License: This work is licensed under CC BY-NC-SA 4.0.