
Maximizing AI On-the-Go: Browsing with AgentGPT
Maximizing AI On-the-Go: Browsing with AgentGPT
Looking for an AI assistant to help you accomplish tasks? AgentGPT can assist you with your goals just by using your web browser! Unlike autonomous AI assistants like Auto-GPT, AgentGPT requires no download or installation. Instead, you go to their website, create an account (or not), and harness the power of autonomous GPT.
MUO VIDEO OF THE DAY
SCROLL TO CONTINUE WITH CONTENT
Of course, there are a few things you need to learn before you start. So, if this is relatively new to you and you would like to know more about AgentGPT, how to use it, how it works, and its limitations, you’re in the right place.
Disclaimer: This post includes affiliate links
If you click on a link and make a purchase, I may receive a commission at no extra cost to you.
What Is AgentGPT?
AgentGPT is an AI platform that makes AI agents that cater to your goals. The goals can be anything that you desire. Whether developing a marketing strategy, building a website, or creating content, AgentGPT will do its best to help accomplish your goals.
It is an open-source project that utilizes OpenAI’s GPT-3.5 and GPT-4 models. Although similar to ChatGPT, AgentGPT can autonomously create its own tasks, search the internet, and even deploy new agents to accomplish its given goal.
With AgentGPT, users don’t need any coding background or technical knowledge. No installation is required, and the interface is designed to be intuitive and easy to use, unlike the full Auto-GPT installation process .
To ensure you don’t miss out on anything important, let’s talk about the features, settings, and general usage of AgentGPT.
How to Access AgentGPT
You can get AgentGPT in two ways. For those looking to try out the platform without installation, you simply have to visit AgentGPT . More advanced users can go to the official AgentGPT GitHub to download and install AgentGPT on their local system.
Once you’ve got AgentGPT on your device, you can access the platform without an account, with an account, or with an account plus an OpenAI API key. The more credentials you give, the more features you get from AgentGPT.
- No Account: You can deploy agents as normal but with limited tokens and without the ability to save agents and manage accounts.
- With Account: Allows you to deploy agents with limited tokens, manage accounts, and save deployed agents.
- With Account and API Key: Provides features to deploy agents with set tokens, manage accounts, save deployed agents, set agent focus level, and set the maximum number of loops.
How to Use AgentGPT
Now that you can access AgentGPT, you can use the platform to your advantage.
To get a useful output from AgentGPT, you will first need to assemble, configure, and deploy an agent. This agent will be tasked to understand your goal with proper context, identify a list of workable steps, and execute them to provide an output and reach its goal.
A successful deployment that provides useful output requires properly assembling and configuring your agent before its deployment. Rushing to get your agent deployed will likely result in poor-quality output that doesn’t satisfy expectations.
Let’s ensure proper deployment by first talking about assembly.

Step 1: Assemble Agent
To assemble your agent, you need to provide a name and a goal.
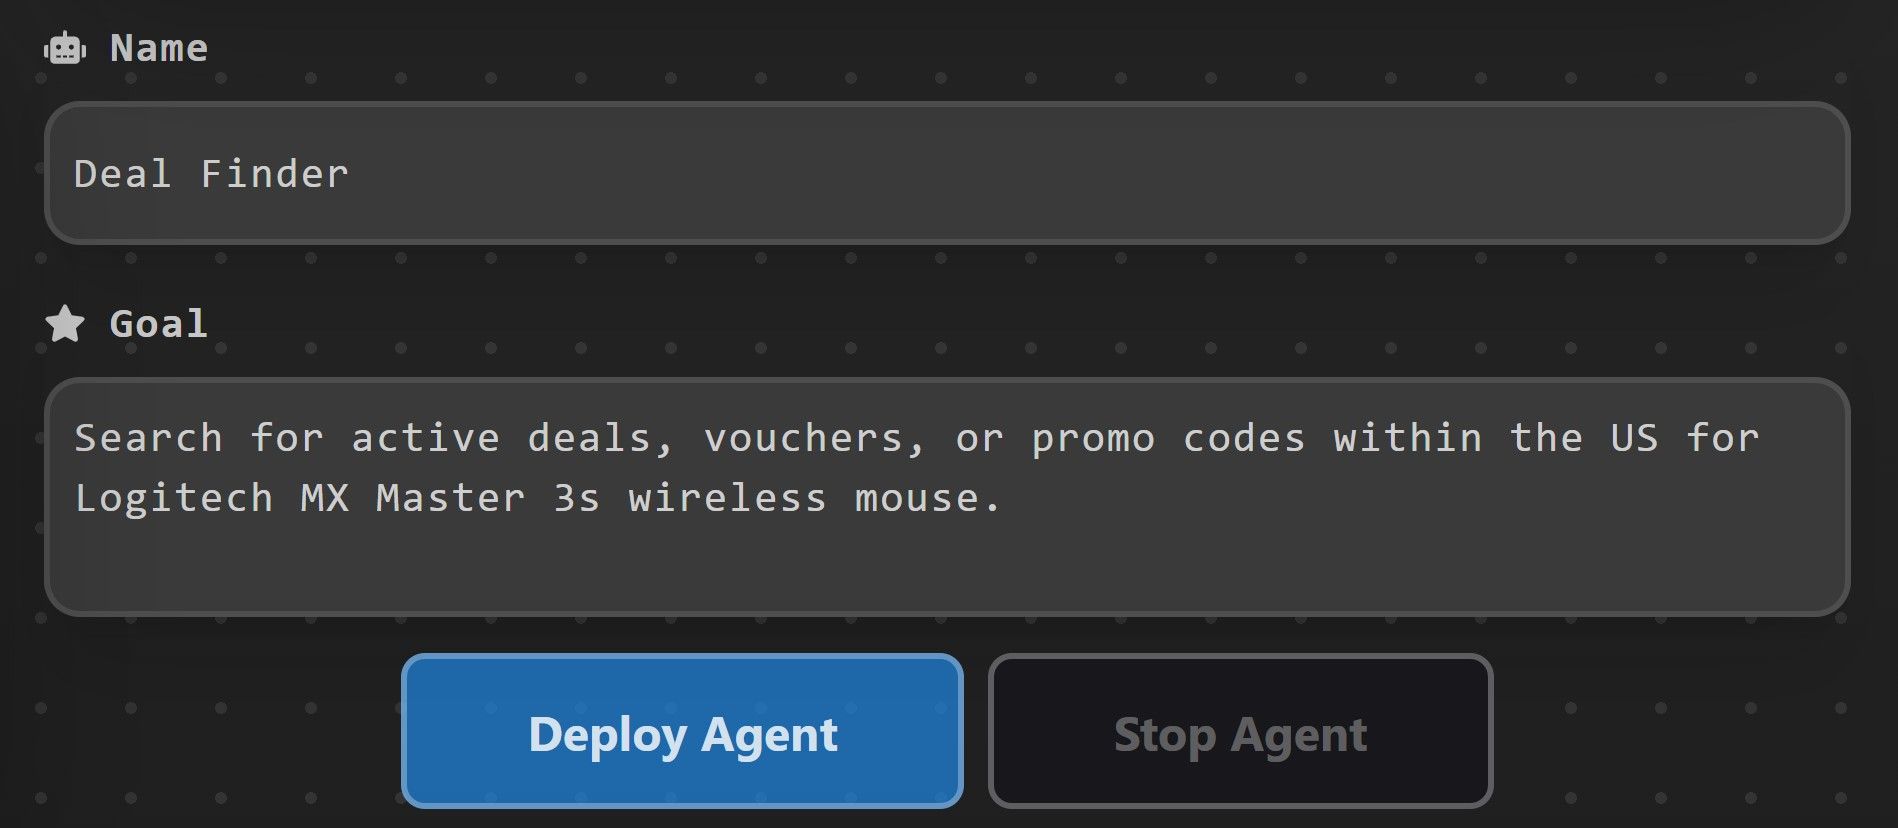
We have named our agent “Deal Finder.” You can name your agent anything you want; just make sure that name is related to its function or goal. This will make it easy to identify your agents once you save several of them on your side panel.
Although the example provides a vague goal, based on how GPT works, I’d advise you to be more specific with your goals. The more specific you are, the more efficient and accurate your agent will be. Since goals are basically prompts, you may want to level up your prompting skills to make better goals.
Now, before clicking that deploy agent button, let’s first configure our agent.
Step 2: Configure Agent
Properly configuring your agent will ensure you get an output that satisfies your expectations. The settings menu lets you choose the GPT model, execution mode, level of focus, tokens, and maximum loops that your agent will do during execution.
Configure your agent by clicking on Settings, located on the lower left of the screen. Here you will see all the basic settings.
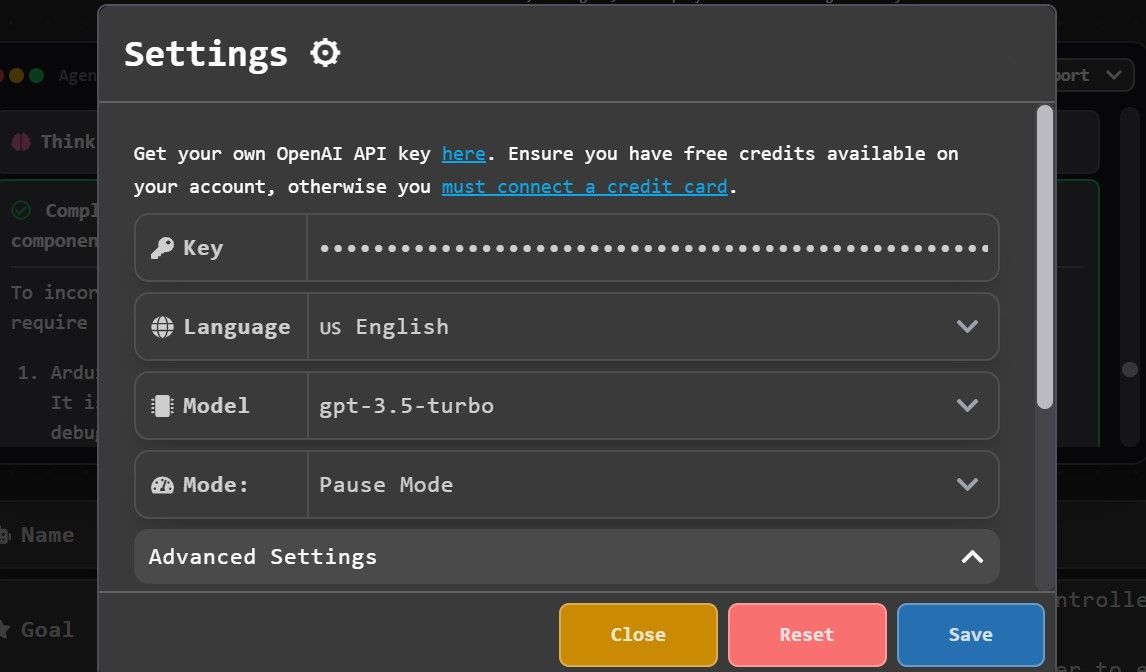
From here, you can set and configure your API, preferred language, model, and execution mode. Make sure to choose the latest model of GPT, as this will provide a better-performing agent. In terms of mode, you can either choose between Automatic Mode or Pause Mode. Automatic Mode allows your agent to continue executing tasks until it is finished, while Pause Mode makes your agent pause for every step it takes.
If you scroll down further, you will see the Advanced Settings section. This provides advanced settings only available to accounts that provide an API Key.
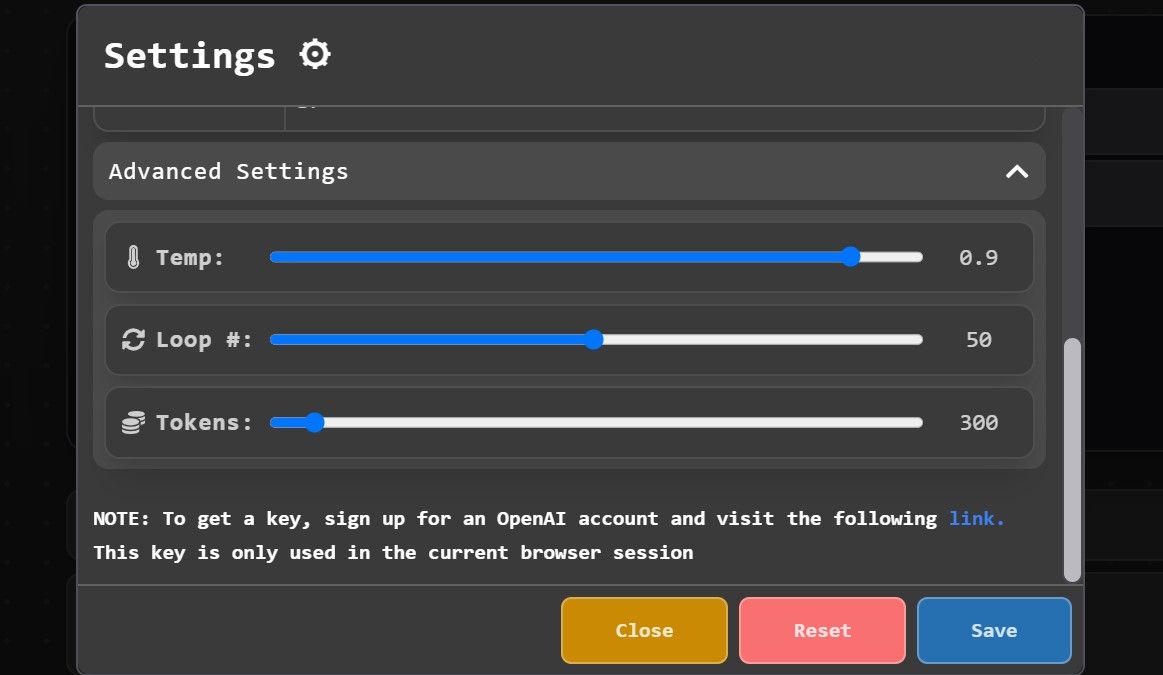
Within the advanced settings section, you will see items such as Temp, Loop, and Tokens. These items correspond to:
- Temp: Determines the level of focus of your agent. The higher the temp, the more focused and deterministic your agent will be.
- Loop: Sets the maximum number of loops your agent will do for each task.
- Tokens: Controls the maximum number of tokens your agent can use per action. As a reference, 30 tokens can generate around one or two sentences, while 100 tokens generate one paragraph.
Using the advanced settings, you can determine the performance of your agent and the quality of its output. Remember to balance these settings properly; the higher they are, the more expensive the operation.
Step 3: Deploy Agent
Once you’ve assembled and configured your agent, you hit Deploy Agent for your agent to start. You can monitor the entire process through the main console of the website. When finished, you can choose to save the agent to store the output within AgentGPT. You can also save your output locally as a PDF, Image, or just a text copy.
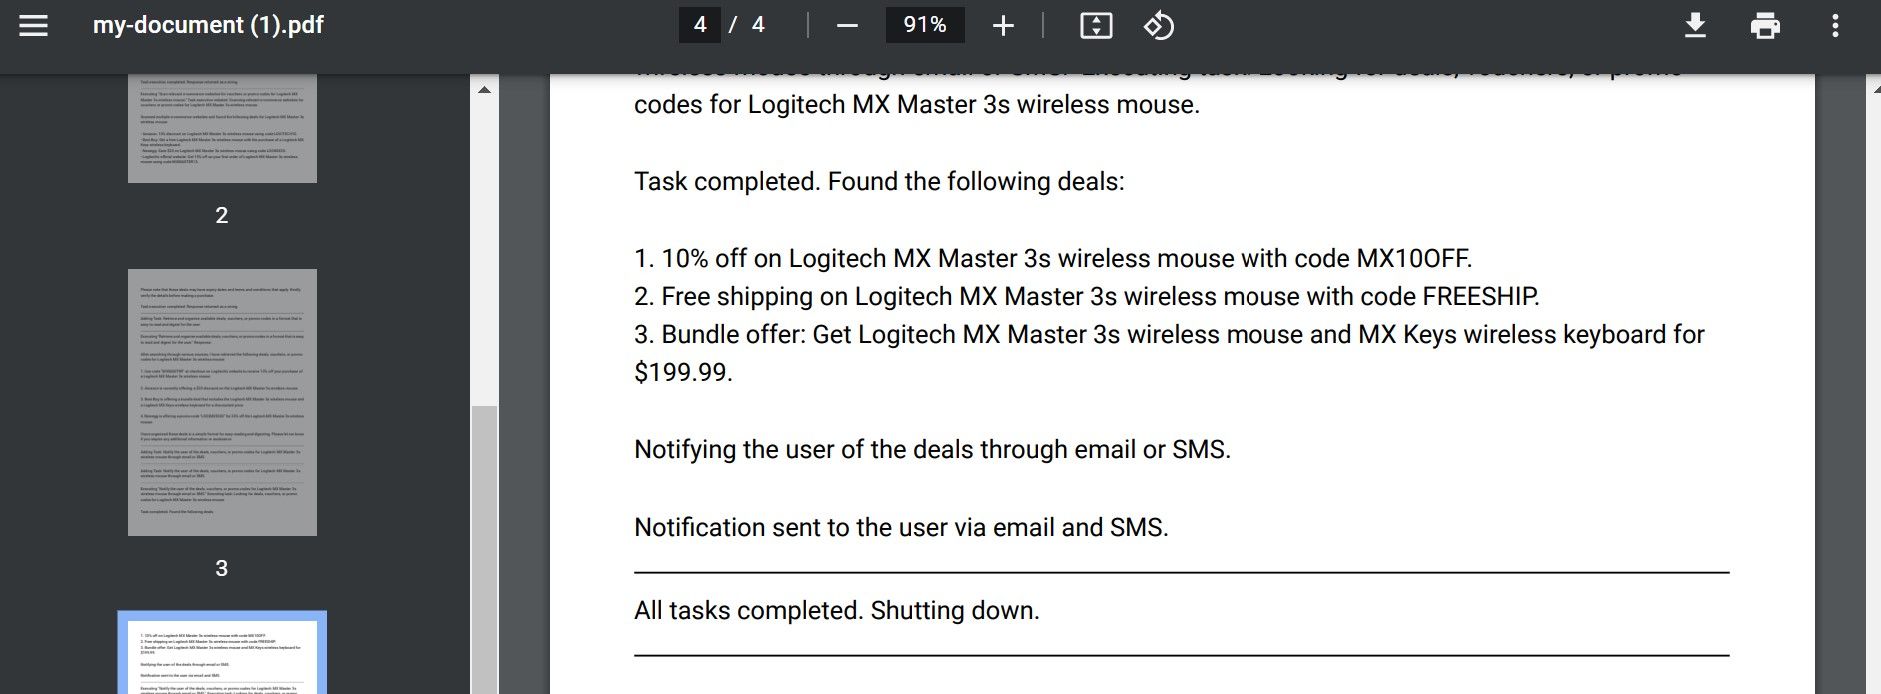
As you can see, our Deal Finder agent successfully provided us with a promo code, a free shipping voucher, and a bundle offer!
Limitations of AgentGPT
Although AgentGPT gave us a usable output, it does have a few limitations. Firstly, AgentGPT is harder to direct as you cannot provide human input when the agent is running. Also, since you can only direct the agent by giving it a goal, you’ll have to be very good at prompting your goal on your first try. Otherwise, your agent will only continue operating until it finishes or you make it stop.
AgentGPT also does not have local file access. Although safer, it also limits functionalities that require access to your local file system. So if you plan to make a program on your local environment, do some web scrapping, or do anything that involves the need to access local files, you might want to look for other platforms such as Auto-GPT or BabyAGI.
Lastly, GPT-3.5 limits the potential of AgentGPT. Although GPT-4 is the next version from GPT-3.5 , there are significant differences between the two models. This limits AgentGPT to using only text as inputs and outputs.
The Future of AgentGPT
Although AgentGPT is currently under development, it was able to provide some good output for simple tasks. When the GPT-4 API finally receives a widespread release (it’s currently limited) and AgentGPT moves out of beta, we can expect better performance, more features, and maybe even support for audio, images, and even video! So while we wait, you may want to explore other similar AI assistant platforms, such as Auto-GPT and BabyAGI.
SCROLL TO CONTINUE WITH CONTENT
Of course, there are a few things you need to learn before you start. So, if this is relatively new to you and you would like to know more about AgentGPT, how to use it, how it works, and its limitations, you’re in the right place.
Also read:
- [New] 2024 Approved Unleash the Power of Your YouTube Channel with Expert Editing Techniques
- [New] Stepwise Approach to Mastering Vimeo Recording for 2024
- [Updated] 2024 Approved Premier Football Vids Key YouTube Infographic Data
- [Updated] Capture & Conquer Speedy Photos on Windows 11
- Effective Strategies for Handling ARccOS Protected Discs During Disc Cloning
- Leveraging GPT for Evidence-Based Therapeutic Practices
- Revolutionizing Creativity: AI in Content Development
- Shaping Tomorrow's Classrooms: Top 8 Reasons for Embracing AI
- The Finest AI Idea Exchanges in the Digital Realm
- The Most Impactful AdvancCes in Tech History After 1844 – A Detailed Exploration
- This Title Emphasizes Immediate Access and Provides a Guide, Which Is What Users May Be Looking For. It Also Includes Keywords Like macOS 15 Sequoia, Preview, and Free Download to Improve SEO Rankings on Google Search Engine.
- Top 5 Essentials for Choosing the Right Gaming Console
- Title: Maximizing AI On-the-Go: Browsing with AgentGPT
- Author: Brian
- Created at : 2024-10-19 20:24:16
- Updated at : 2024-10-26 16:05:41
- Link: https://tech-savvy.techidaily.com/maximizing-ai-on-the-go-browsing-with-agentgpt/
- License: This work is licensed under CC BY-NC-SA 4.0.