
Step-by-Step Tutorial on Generating Unique AI Graphics: Gifs and Videos via Stable Diffusion

Step-by-Step Tutorial on Generating Unique AI Graphics: Gifs and Videos via Stable Diffusion
Quick Links
Key Takeaways
To make an animation using Stable Diffusion web UI, use Inpaint to mask what you want to move and then generate variations, then import them into a GIF or video maker. Alternatively, install the Deforum extension to generate animations from scratch.
Stable Diffusion is capable of generating more than just still images. With some built-in tools and a special extension, you can get very cool AI video without much effort. Here’s how to generate frames for an animated GIF or an actual video file with Stable Diffusion.
Stable Diffusion Can Generate Video?
While AI-generated film is still a nascent field , it is technically possible to craft some simple animations with Stable Diffusion , either as a GIF or an actual video file. There are limitations though.
Because img2img makes it easy to generate variations of a particular image, Stable Diffusion lends itself well to quickly crafting a bunch of frames for animations, cyclical ones in particular. Think flames licking up from a fire, wheels spinning on a car, or water splashing in a fountain. A practical use could be giving a lifelike ambiance to some RPG artwork:
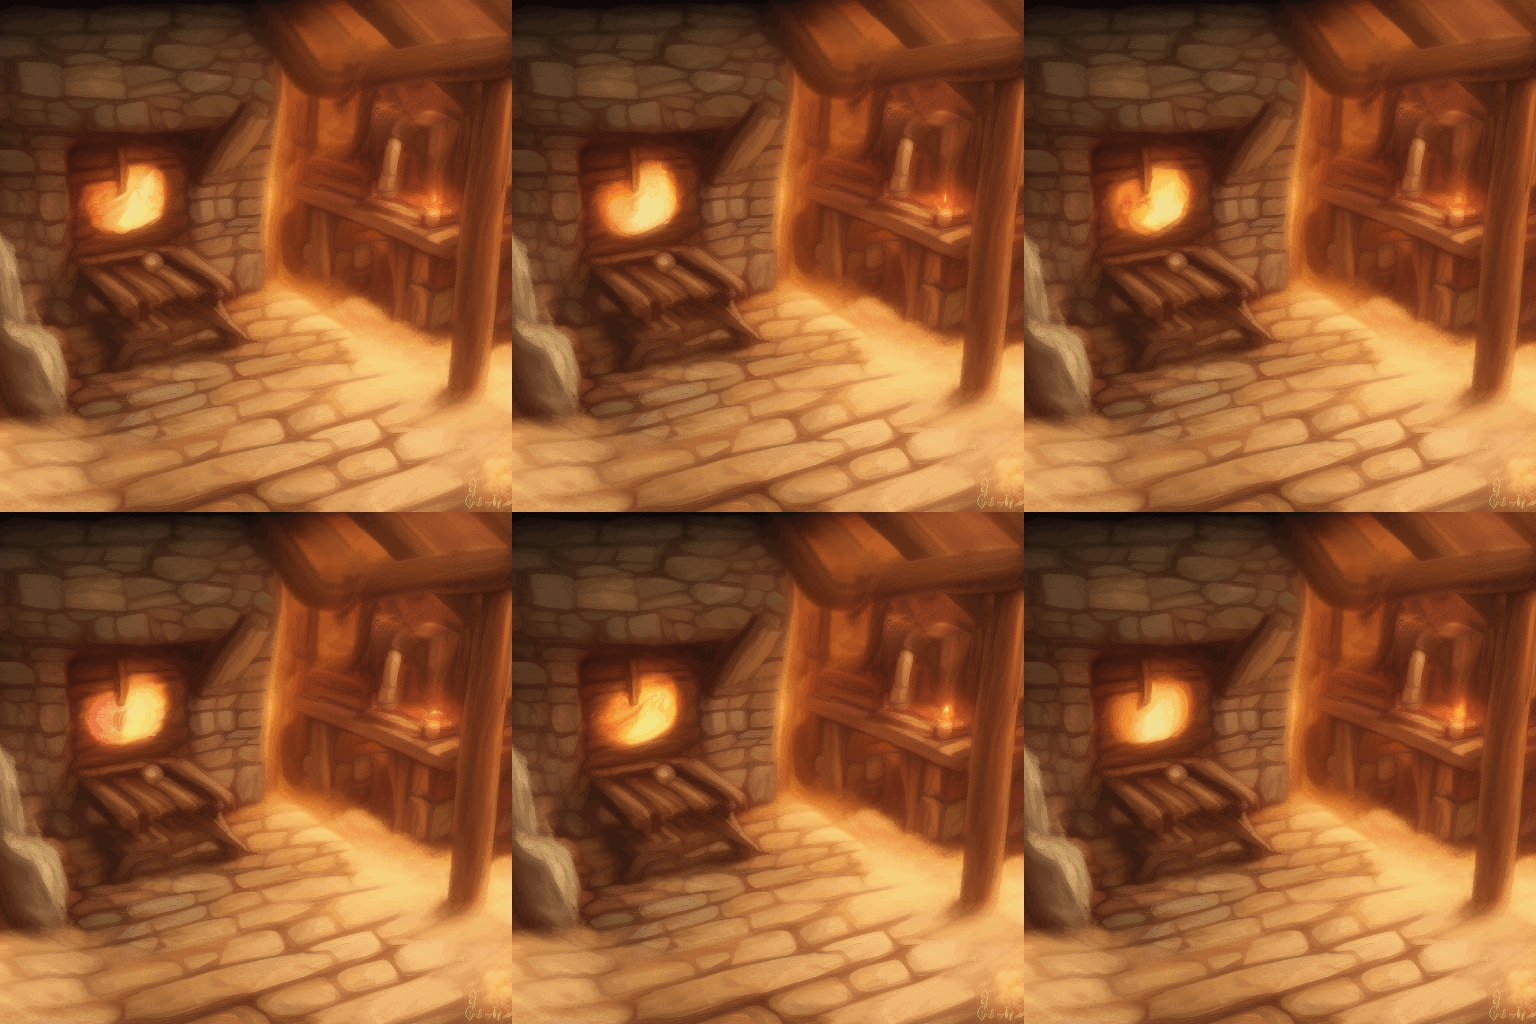
Jordan Gloor / Stable Diffusion / How-To Geek
You can even make videos based on real images instead of synthetic ones. Here I took a photo of a plant being watered and, with a few clicks, animated the water stream:
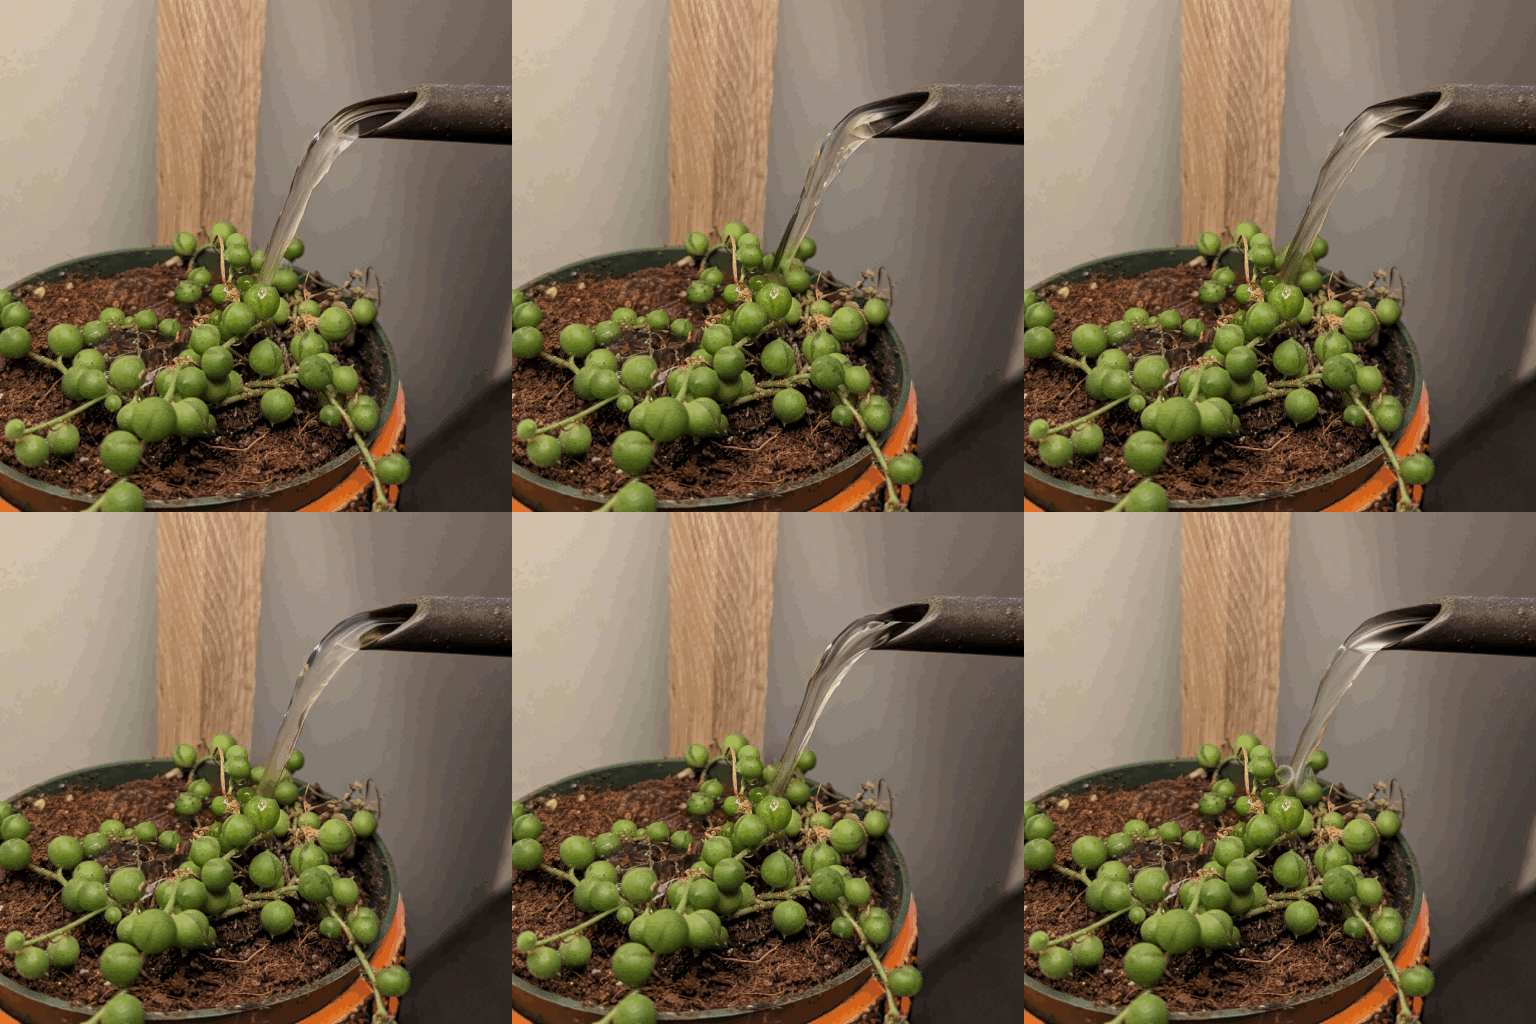
Jordan Gloor / Stable Diffusion / How-To Geek
If you want to animate an object so that it moves from point A to point B, that’s a tall order for Stable Diffusion (at least for now). You’d likely be spending a lot of time tweaking prompts and settings, then poring over a ton of output to find the best frames and placing them in correct order. At that point, you might as well break out Adobe Illustrator and just start animating by hand.
Despite that, you can make some cool, simple animations with a basic Stable Diffusion setup and another tool of your choice for stitching the frames together in an animation. There’s also a project called Deforum that uses Stable Diffusion to create “morphing” animations that look pretty interesting. It’ll spit out an MP4 video, so no external tools are required, and it even lets you add audio. We’ll show you the basics of both methods.
For the purpose of this article, we’re going to assume you’ve already installed a graphical interface for Stable Diffusion , specifically AUTOMATIC1111’s Stable Diffusion web UI . Compared to the standard command line install , it makes generating images way easier and comes with a ton of handy tools and extras.
Animate an Image Using Inpaint
Using the img2img tool Inpaint, you can highlight the part of an image you want to animate and generate several variations of it. Then you’ll drop them into a GIF or video maker and save the frames as an animation.
Step 1: Get an Image and Its Prompt
Start by dropping an image you want to animate into the Inpaint tab of the img2img tool. If you don’t have one generated already, take some time writing a good prompt so you get a good starter photo. You could also import an image you’ve photographed or drawn yourself.
If you’re importing an image that you didn’t generate with Stable Diffusion, you’ll still need an appropriate prompt for generating variations, so click “Interrogate CLIP” at the top of the Img2Img page. That will generate a starter prompt based on what Stable Diffusion thinks your image contains. Complete the prompt by adding any other important details.
For our guide, we’ve generated a 512x512 image of a robot under a night sky that we want to give a time-lapse sort of animation, with shooting stars and galaxies passing by.
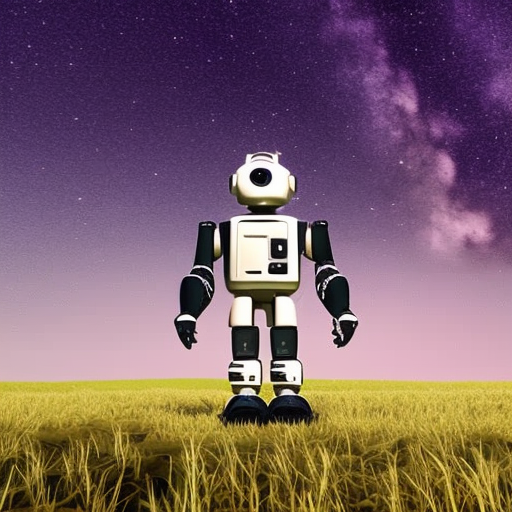
Stable Diffusion
If you want to follow along precisely, you can recreate it with the prompt we used:
a robot stands in a field looking up at the night sky during a meteor shower, shooting stars, galaxies, the cosmos, milky way, ultra realistic, highly detailed, 4k uhd
And these are the settings we used:
Checkpoint: Stable Diffusion 2.0
Sampling Method: DPM++ SDE
Sampling Steps: 20
CFG Scale: 5
Seed: 4177542269
Step 2: Mask the Parts to Animate With InPaint
With your image and prompt in place, in the Inpaint tool, use the paintbrush to mask (cover up) every part of the image you want to animate. Leave uncovered anything you want static.
In our example, we’re covering most of the sky. We left a bit of cushion around the robot because in our testing, if we got too close, Stable Diffusion would sometimes add antennae and other appendages to the robot.

Stable Diffusion
You can adjust the Inpaint brush size with a slider by clicking the brush button in the top-right corner of the canvas.
Step 3: Generate Your Frames
Now that you’ve masked every part of your image you want to see moving, it’s time to generate the frames of our animation. But first, you’ll want to make sure img2img has the right settings. They can be confusing, so we’ll explain what some of them mean and why you may or may not want to tweak them:
- Mask Mode: Inpaint Masked - This makes sure everything covered gets changed and not the other way around. If, for some reason, you want to modify the unmasked part instead, change it to “Inpaint Not Masked.”
- Masked Content: Original - This ensures Stable Diffusion will see and take into account the existing image when it’s generating variations. Otherwise, it will consider the masked content a blank or randomized canvas.
- Inpaint Area: Whole Picture - This forces Stable Diffusion to generate a whole new image for each frame before integrating it with the original image. Switching to “Only Masked” might speed up generation but may also give you worse results.
- Sampling Method: DPM++ SDE - This is the same sampling method we used for generating our original image, and we’re sticking with it to ensure a consistent look. If you don’t know what to use, “Euler a” is an all-around good choice.
- Batch Count: 60 - This is how many images you want to generate. You may need more or fewer depending on how fast and how long you want your animation sequence to be.
- CFG Scale: 5 - The CFG scale, in a sense, determines how much creative liberty Stable Diffusion has. The higher the number, the more strictly Stable Diffusion will try to follow your prompt. Increasing it and getting good results requires having a very good prompt.
- Denoising Strength: 0.3 - Possibly the most important setting for this project, the denoising scale determines how much Stable Diffusion will change the original image. You probably want to keep it down around 0.2 or 0.3, since too much frame-to-frame change can ruin animation.
- Seed: -1 - This tells Stable Diffusion to start with a random seed. We don’t recommend reusing the seed from your original image, since that reduces the amount of variation you’ll get (if any at all).
With all of your settings in place, click “Generate” and sit back while Stable Diffusion draws your animation frames for you. You’ll find them in the /outputs/img2img-images folder of your Stable Diffusion directory. If you don’t like the results, tweak the settings (probably starting with denoising strength and sampling steps) and try again.
Step 4: Batch Upscale Your Frames (Optional)
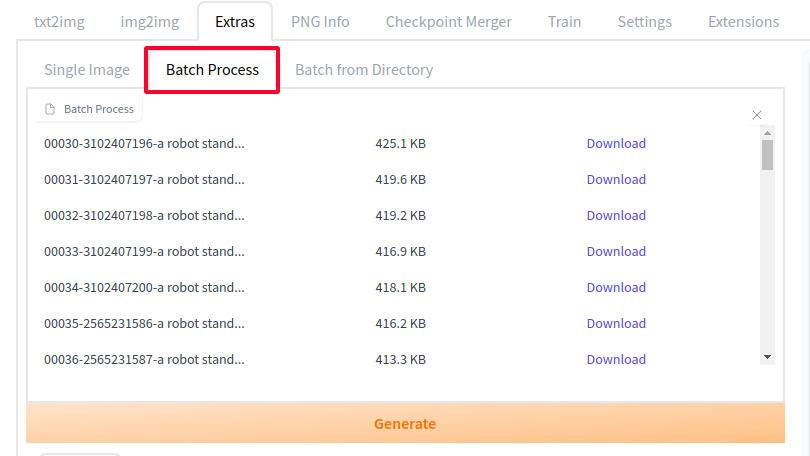
If you plan to create a high-definition video, remember to upscale all your newly generated frames to the resolution you want. Click “Send to Extras” to get started.
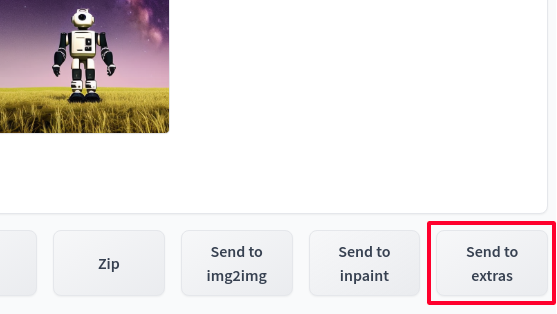
Inside Extras, switch to the “Batch Process” tab.
Adjust the “Resize” scale to the number of times you want it resized (setting to 2 will change 512x512 images into 1024x1024 images). Alternatively, switch from “Scale by” to “Scale to” and set a specific resolution. Also set “Upscaler 1” to the upscaler of your choice. We had good enough results with R-ESRGAN 4x+, but feel free to experiment to see which handles your images best.
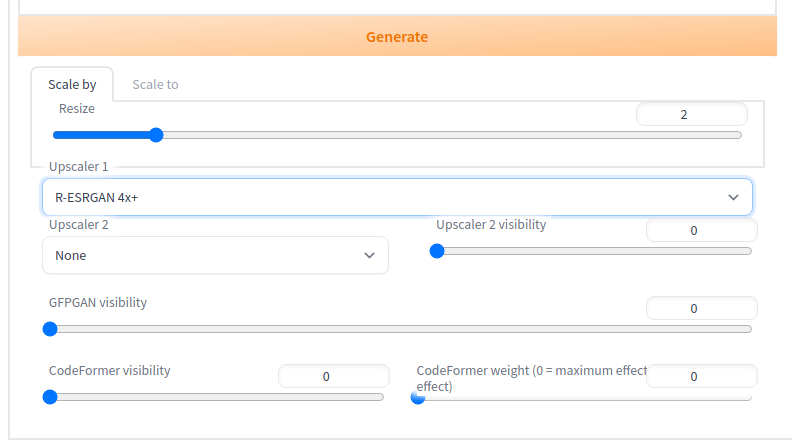
Then hit “Generate” and Stable Diffusion will give you a higher-resolution version of each frame, saved in your /outputs/extras folder.
Step 5: Animate the Frames in a GIF or Video Maker
Now that you’ve got your frames, it’s time to stitch them all together and create your final animation. There are many tools you can do this with, including free dedicated websites like Ezgif and flixier that are easy to use and have a lot of fine-tuning controls. However, remember that those websites can see everything you upload, so don’t give them anything you aren’t comfortable with the world knowing about.
While those websites are pretty self-explanatory, we’ll be demonstrating how you use a free offline photo editing tool, GIMP , to make a GIF. If you want a video file, use Kdenlive or a similar video editor instead—just make sure you tweak the settings so all your frames get imported as clips that are one second or shorter, depending on many frames per second you want.
To begin, download GIMP and install it on your computer if you haven’t already. Launch it, then go to File > Open as Layers.
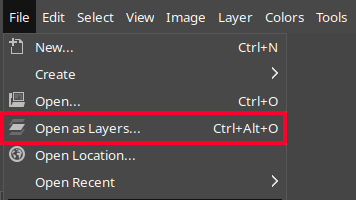
Find where the frames you generated are and select all of them at once before clicking “Open.” (Hold the Shift key to select multiple files quickly.) GIMP will import all of your images as a separate layer on one canvas. We want this because the way GIMP’s GIF generation works is by going through every layer from bottom to top, treating each consecutive layer as the next frame in the animation.
Now’s the fun part. To watch a preview of your GIF, go to Filters > Animation > Playback.
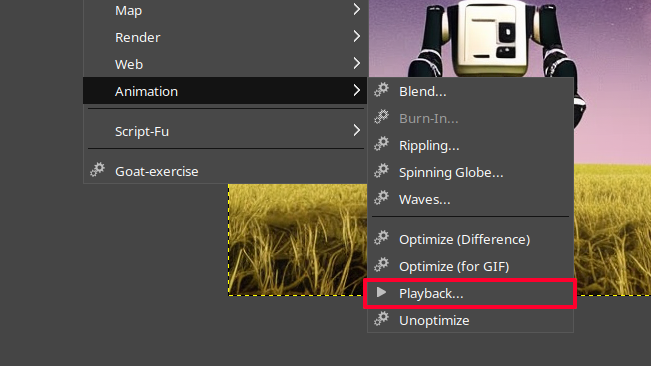
Press the spacebar to play and pause the GIF. If frames go by too fast or slow, adjust the FPS at the bottom of the playback dialog, and click the refresh button at the top to reload the preview with the new frame rate.
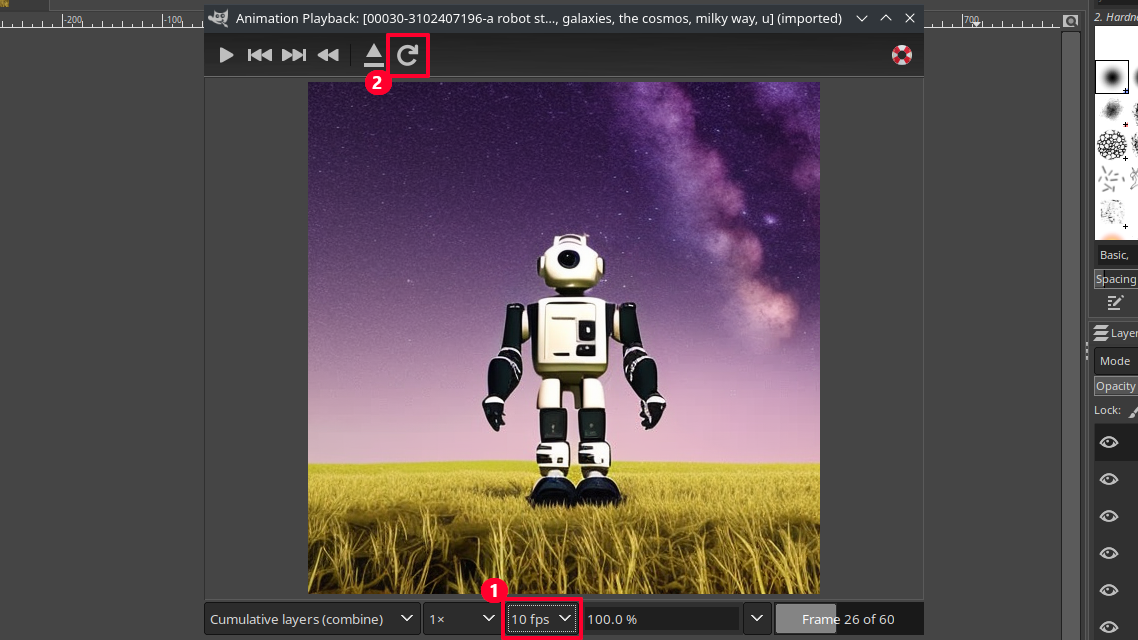
Once the animation looks good to you, it’s time to generate the GIF file. Close the preview and click File > Export As. When you type in the file save name, add the .gif extension to the end so that GIMP knows you want a GIF.

Stable Diffusion
In the GIF export dialog box that appears, make sure the “As Animation” box is checked. Adjust the number of milliseconds between frames too if you want a different frame rate. There are 1000 milliseconds in a second, so 100 will get you right around 10 FPS. Finally, click “Export.”

Stable Diffusion
Boom, you’ve got your complete animated GIF.
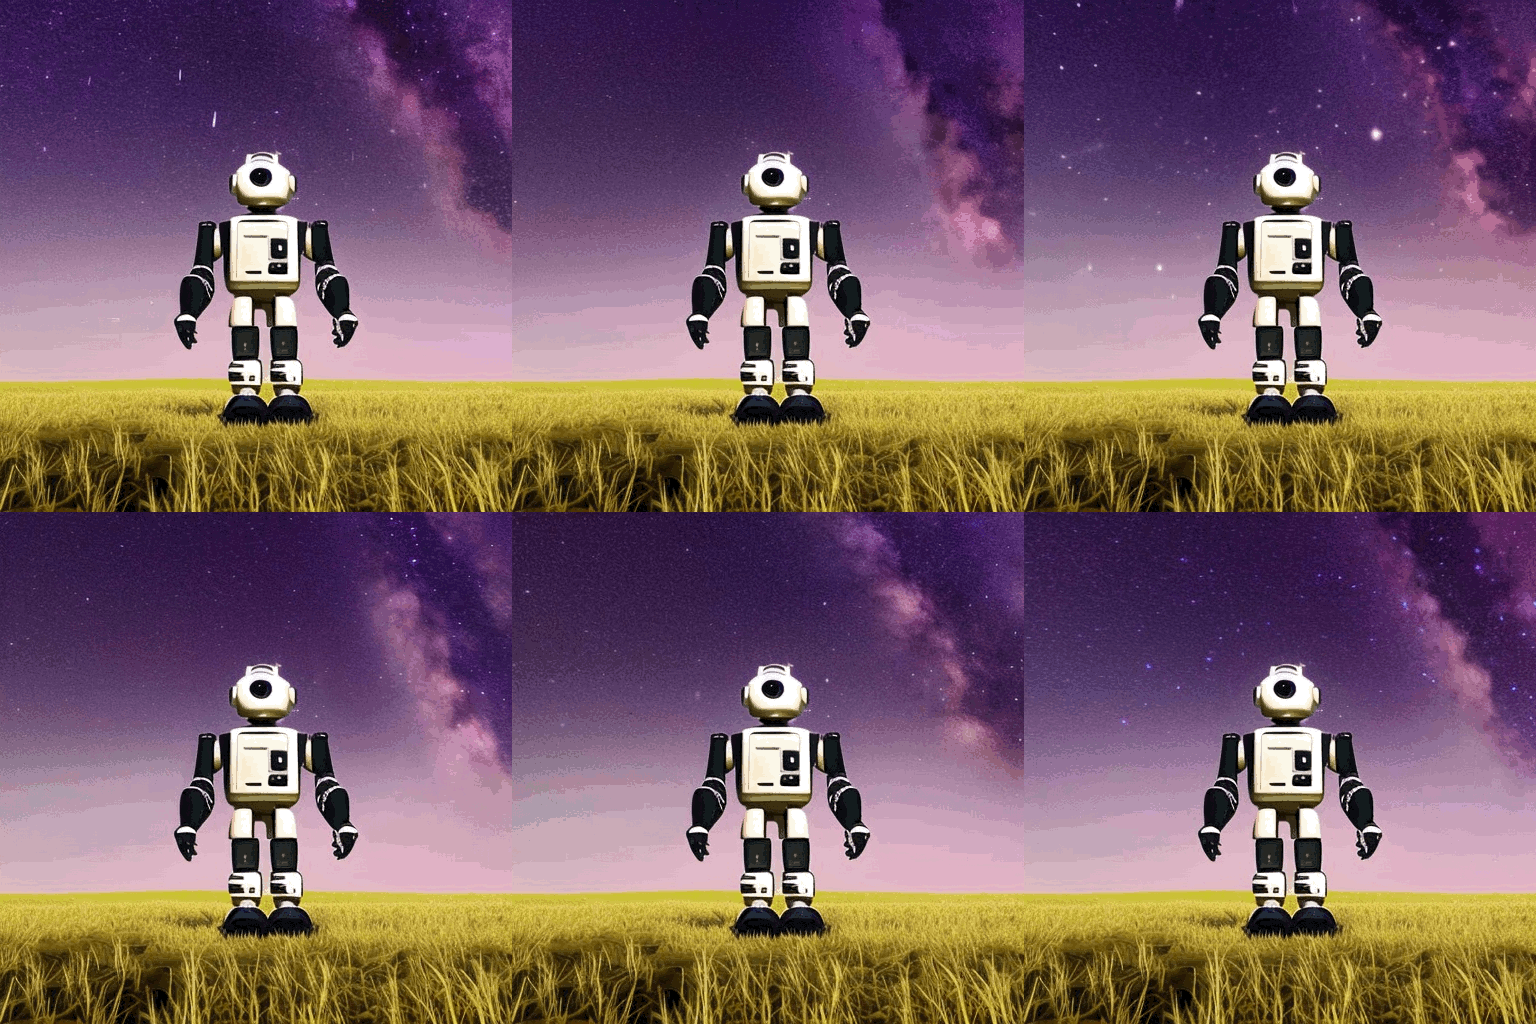
Jordan Gloor / Stable Diffusion / How-To Geek
Generate a Video Using Deforum
If you want to want to create more interesting animations with Stable Diffusion, and have it output video files instead of just a bunch of frames for you to work with, use Deforum . It’s an image synthesis project with an extension available for Stable Diffusion web UI that lets you direct and generate MP4 video files, even with audio. It’s a very powerful and complex tool with a lot of settings to experiment with, including camera pans and zooms, multiple prompts, and video import.
For our purposes, we’ll just introduce you to the basics of generating a fairly simple but interesting animation.
Step 1: Install the Deforum Extension
To get the Deforum extension , open a command prompt and change directories to your stable-diffusion-web-ui folder. Then use this git clone command to install Deforum in your extensions folder use.
git clone https://github.com/deforum-art/deforum-for-automatic1111-webui extensions/deforum
Launch Stable Diffusion web UI as normal, and open the Deforum tab that’s now in your interface.
The Deforum extension comes ready with defaults in place so you can immediately hit the “Generate” button to create a video of a rabbit morphing into a cat, then a coconut, then a durian. Pretty cool!
Step 2: Write Your Prompts
You might be used to writing individual prompts with Stable Diffusion, but Deforum lets you write multiple prompts that are “scheduled,” meaning at whatever point in the animation you choose it will switch to generating frames based on the next prompt in the schedule.
Click the “Prompts” tab and change the existing prompts to whatever you want, keeping the bracket and tab structure in place. For our example, we’ll use this set of prompts:
{ “0”: “a robot stands under the night sky during a meteor shower, shooting stars, galaxies, the cosmos, milky way, ultra realistic, highly detailed, 4k uhd”, “40”: “a space station flies through space during a meteor shower, ultra realistic, highly detailed”, “80”: “a supernova explodes, vibrant colors, ultra realistic, highly detailed”}
So what do those numbers mean? By default Deforum generates 120 frames for your animation, and we’re dividing that set of frames into three parts. 0 signifies the first frame, so it and all frames after it will be im2img variations of the first prompt. Then at frame 40, Stable Diffusion will start making variations based on our second prompt. At 80, it switches to the third. You can add as many prompt changes as you want and adjust the max frame limit on the Keyframes tab as needed.
Step 3: Adjust Deforum Settings
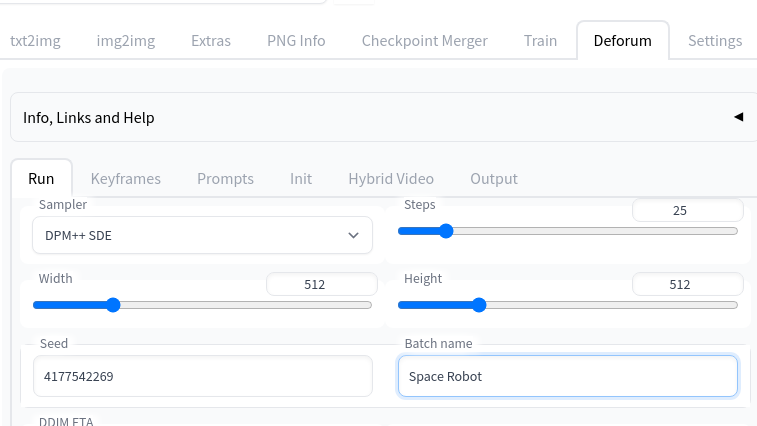
You’ve probably already noticed there are a ton of settings involved in Deforum, but we’ll walk through a few to get you started. First, in the “Run” tab, you’ll find many of your typical Stable Diffusion settings. Rename the batch, enter the seed you want to start with (we’re reusing the one for our robot), and change the sampler to the one you want.
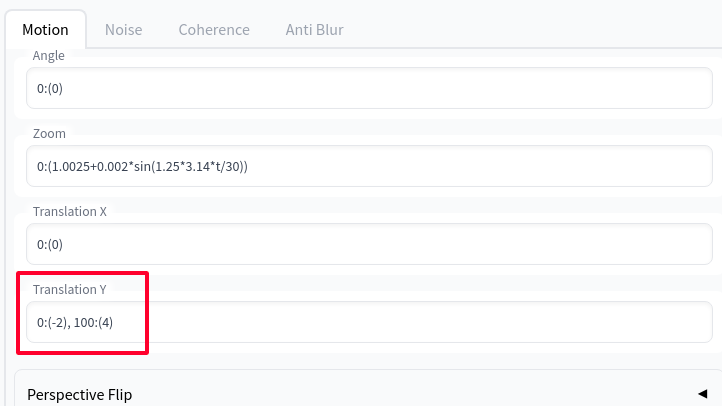
In the Keyframes tab you can adjust the motion of the “camera” for the animation. It’s set by default to zoom at intervals, but we want to add a vertical “pan” movement, so we’ll add 0:(-2), 100:(4)to the “Translation Y” frame. That tells Deforum to treat the first frame as being at pixel -2 on the Y axis, then by frame 100 move to pixel 4. That will give us a slight pan upward as the animation progresses.
In the Output tab, we’ll check the “Make GIF” box which will give us a GIF file in addition to the MPEG video file. This is also where you’d add audio with the “Add Soundtrack” and “Soundtrack Path” settings, if you have some.
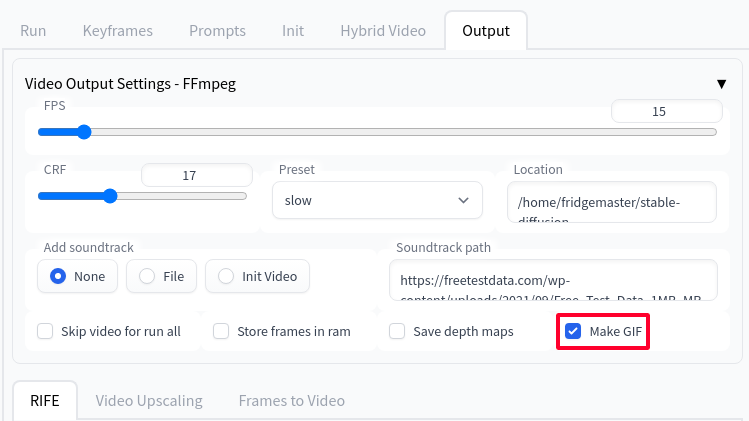
Step 4: Generate Your Video
Finally, hit that big “Generate” button. Since Deforum is creating and stitching many frames, this will take time, so grab some coffee while you wait. When it’s complete, you’ll find the MPEG file, the GIF version, plus every individual frame and a readout of the settings you used under the batch name in your /outputs/img2img-images directory.
Here’s what our prompt got us:
Your browser does not support the video tag.
It’s no summer blockbuster, but it’s still kind of mesmerizing! Check out the official Deforum quick start guide to learn about all the other knobs and dials you can adjust.
If you’re looking for other cool AI projects, learn how to generate Minecraft texture packs with Stable Diffusion or get started with ChatGPT , plus the surprising things you can do with ChatGPT .
Also read:
- [New] 2024 Approved Mastering YouTube Channel Lockdowns Device-Specific Tips
- [New] Master the Art of Mobile Movie Watching with Top 10 iOS Apps for 2024
- [Updated] Premier Pastimes Away From Sports Stadiums, Ranked
- 2024 Approved Elevate Your Video Content with Effective Unboxing Tactics
- Elevate Text Input Functionality: Implementing Bing AI Chat for Android Users
- Here are Different Ways to Find Pokemon Go Trainer Codes to Add to Your Account On Apple iPhone 8 | Dr.fone
- How VPNs Influence GPT' Point-to-Point Engagement?
- In 2024, Audio Docking Systems for Immersive Experience
- LinkedIn Prowess: Leveraging ChatGPT for a Competitive Edge in Employment Searches
- Optimizing Your ChatGPT Experience on macOS
- Precision Modification: ChatGPT's Role in Custom Cars
- Seductive Syntax: Pickup Lines in Deutsch
- Snapchat My AI: The 6 Driving Forces Behind Its Success
- Understanding Keygen Virus in Windows: Causes and Removal Guide
- Title: Step-by-Step Tutorial on Generating Unique AI Graphics: Gifs and Videos via Stable Diffusion
- Author: Brian
- Created at : 2025-01-25 02:14:30
- Updated at : 2025-02-01 05:18:58
- Link: https://tech-savvy.techidaily.com/step-by-step-tutorial-on-generating-unique-ai-graphics-gifs-and-videos-via-stable-diffusion/
- License: This work is licensed under CC BY-NC-SA 4.0.